In this lesson of Photoshop tips, you will learn how to create golden text design using layer effects in Photoshop? Also you will learn something new about Drop Shadow, Outer Glow and Bevel & Emboss in layer effects.
- How to Create Chocolate Text Design in Photoshop?
- How to Create Silver Text Effect in Photoshop?
- How to Create Glass Effect Text Using Photoshop?
- How to Create Metal Text in Photoshop?
- How to Create 3D Wooden Text in Photoshop?
Create Golden Text Design Using Layer Effects
1. press Ctrl+O to open, Open dialog box and then open your Background, After Opening your Background Press T on the keyboard to select Horizontal type tool. It depends on your own desire which font you are going to use, but the font which I used is known as Knuckle Down, you can download it from google or Adobe Typekit.After selecting type tool, type anything which you desire with this code ffd34e which is yellow color.

2. After typing go to technig layer, right click and select blending options.
Note: you can reach to blending option in different methods:
- Double click on the layer, Blending option will appear.
- In layer Panel, at the bottom you can see F(x), it is also Blending options.
- And third method is right click on the layer and then select Blending options.
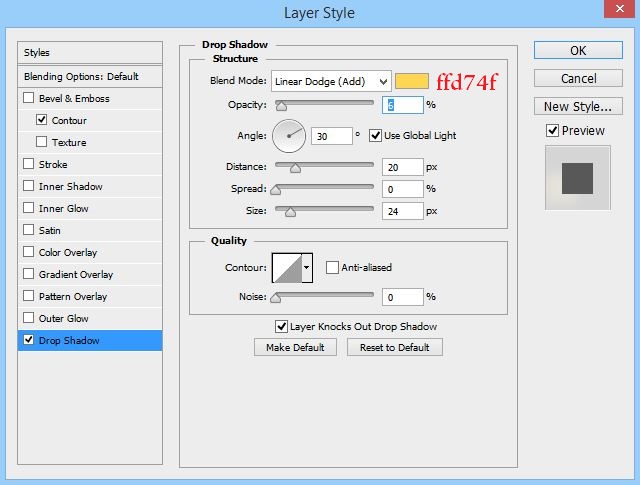
3. When you opened Blending options, select Drop shadow and these settings. Mostly we use Drop shadow for giving shadow, inside, outside or in the center.
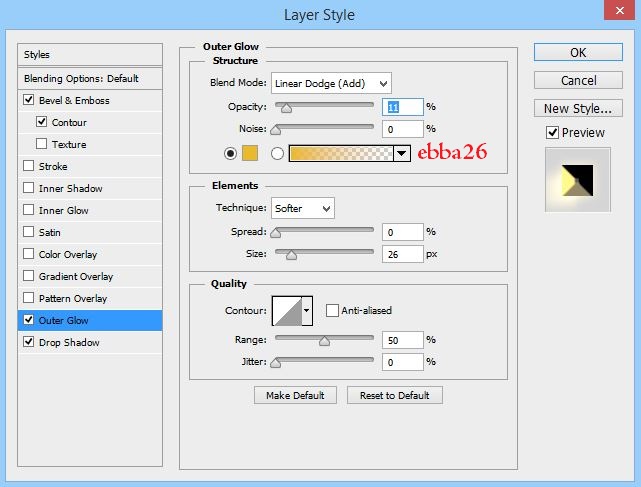
4. After applying those settings for Drop shadow, it is time to apply these settings for outer glow to give some shiny light for text effect. The reason why I am using outer glow is, it gives us the gold light with the code which we applied for the first time when we typed.
5. In this step what I need is to create bevel and Emboss by reaching to bevel and Emboss. In order to do this, apply these settings.
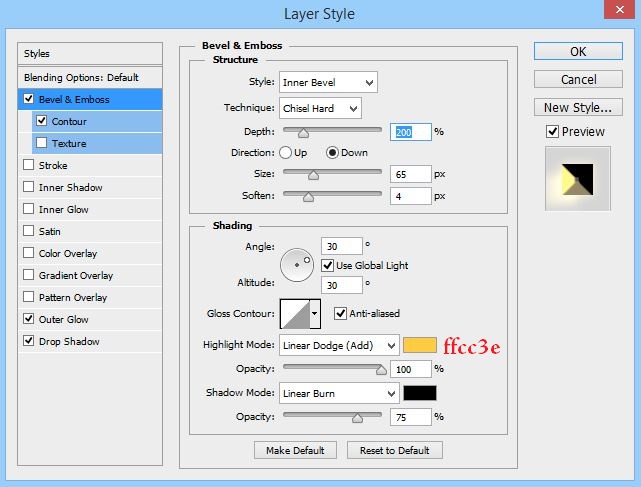
6. And the last step which we need is to apply contour which is sub menu of bevel & Emboss. Put its range to 50 percent, check aliased and select linear for the contour by reaching to its options.

Congratulations you have created Golden Text Design in Photoshop. See the final result bellow image.

I hope you have learned the important role of bevel & Emboss in layer effects, because in the last four or five lessons, I usually used Bevel & Emboss, and I also hope you are going to create your own name using these tips and tricks of Photoshop. If you had any question, so please feel free and ask from me, I will be there to answer you.