As my previous Photoshop tips and tricks articles, I would like to create a new brand design in Photoshop, which is create chocolate Text Design in Photoshop using layer effects. In this lesson I will introduce you with Gradient fill layer, and again Bevel and Emboss Will be reviewed but in advanced.
Create Chocolate Text Design Using Photoshop
1. Press Ctrl+N for creating a new document with width of 1936 pixel and height of 1200 Pixel. Go to layer panel – New fill layer and select Solid color, a new window will appear which is known as New Layer.
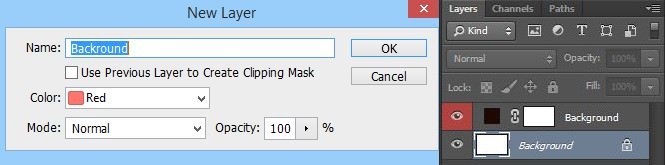
In this panel you can change its name, layer color– Mode and opacity I will rename it from untitled to Background with red color layer Panel. After clicking OK, you will be direct to color picker panel– change its code to 201004 which looks like Dark gray color, after typing the code press Enter on the keyboard or click OK. After clicking OK, you can see your layer color in layer panel is red and named as Background layer.
2. Go to tools bar and select type tool, Under the Menu Bar you can see properties of selected tool,Change its font type to Copper Black. Simply I can tell you about properties of type tool, you can change its font type, size, Effect, Position, Warped text and at last you can open characters.Type anything you want; I will simply type Technig.

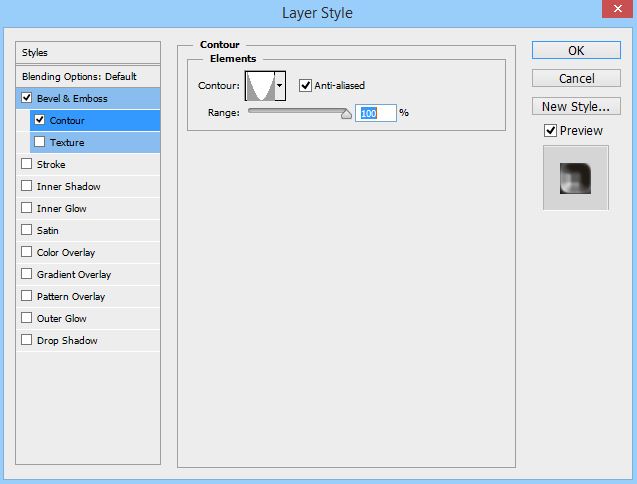
3. After typing, navigate to Technig layer in layer panel, right click select Blending Options. Go to Bevel and Emboss apply these settings to give chocolate effect in half.

For Contour settings which is sub menu of Bevel and Emboss. Here put its range to 100 and from Contour select Cone inverted which looks like double mountain in front of each other.
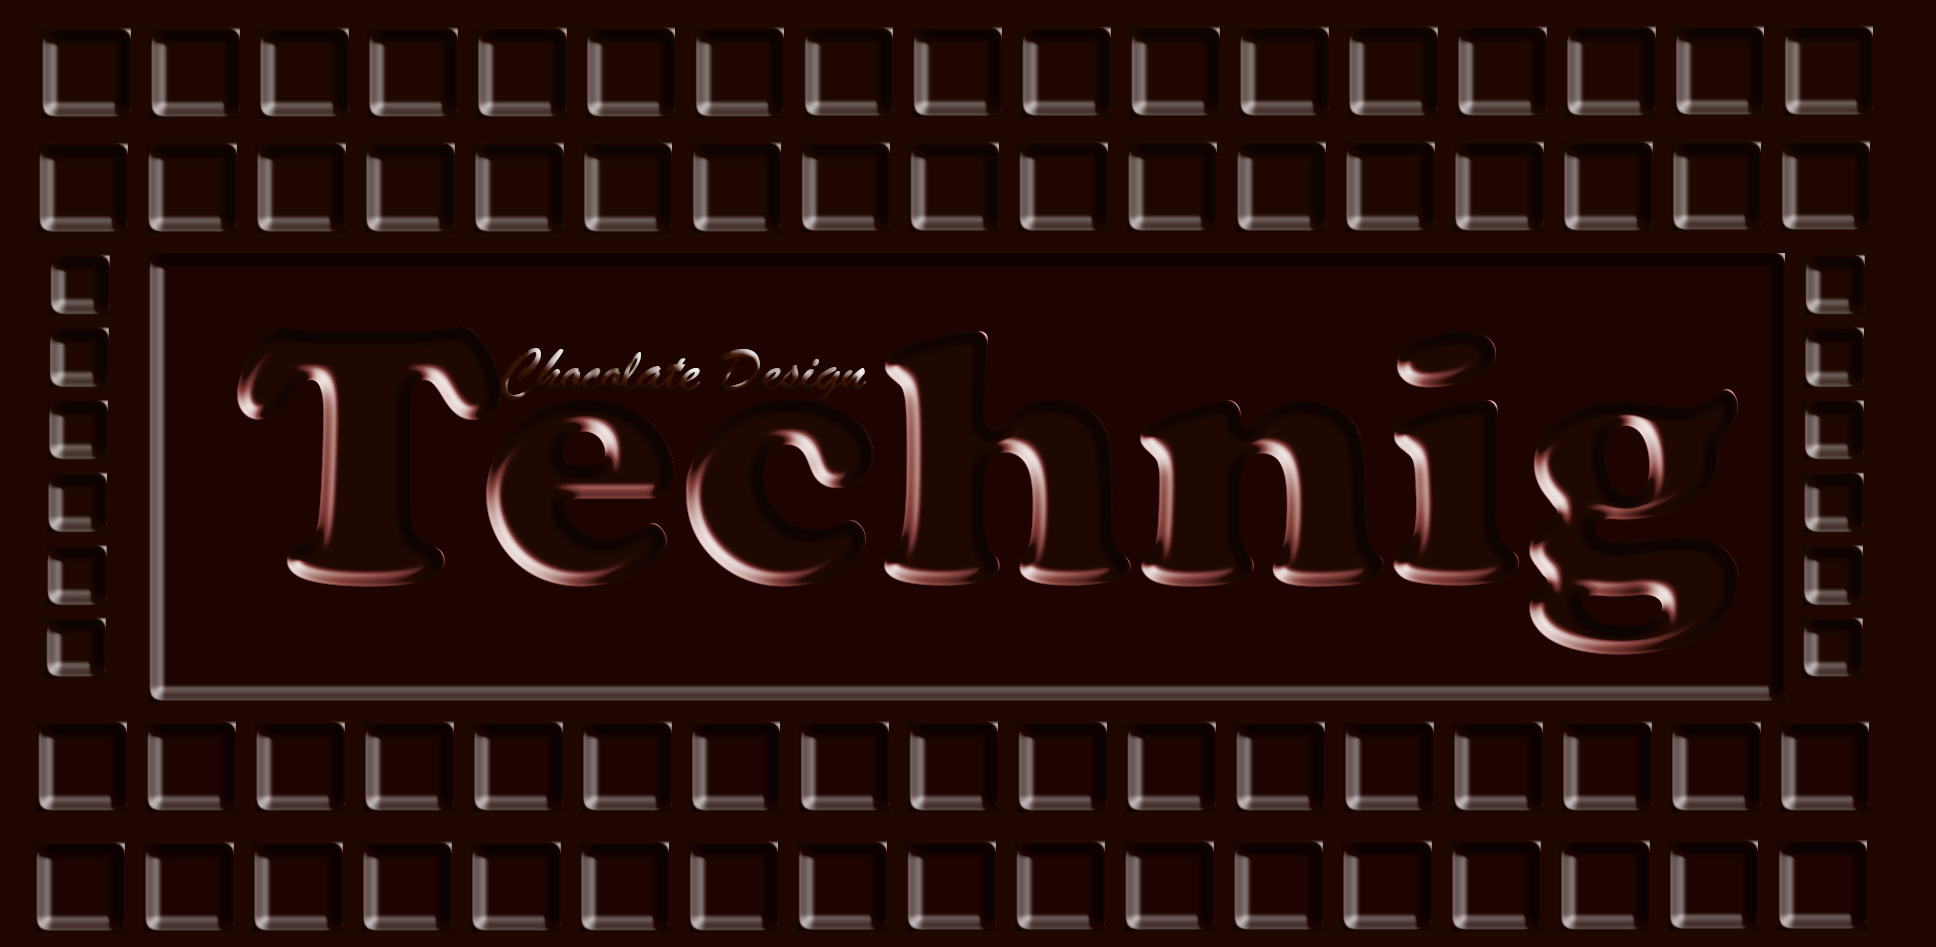
4. Till these step you have created amazing and exciting chocolate effect on your text.
Actually if you want to apply creamy effect, you need to rasterize type layer, but I will introduce you a new way to do not rasterize it. In order to do this press Ctrl+Shift+N to create a new layer, and then select Technig layer, press Ctrl on the keyboard and click on the Technig layer to load selection, Then Press Ctrl+C and Ctrl+V to paste it to the new layer, and simply right click to the Technig layer copy its layer effects and paste it on new layer. Also if you want your chocolate look like it has been dropping down go to filter- select liguify and change its shape as your own desire. However, I am not interested in any of them. I will simply move forward to create square chocolate, in order to create this, go to rasterized text layer which you created before. Press M to select Elliptical Marque tool and draw it around your technig layer in surface of Photoshop and change its blend mode to overly. Here you will have an exciting fram around your written text.
For Creating square, first select Brush and then go to window select Brush and increase its spacing. Go ahead and click once to one corner of your surface and then press shift to draw squares like straight line.
Finally, you have created your own Chocolate text design. I hope you enjoy this how to Create Chocolate Text Design Photoshop article. Let met know if you have created something better with Photoshop designing technique.