Every time we use 3D Panel for creating 3D design on texts or other 3D animation projects. This time let’s create 3D wooden text in Photoshop. So, in this Photoshop Tips articles, I will not use 3D panel for creating this design, I simply will use its own text with some editing on the text to give 3D effect.The only purpose of creating this project is introducing type tool- also you will learn a new trick for copying and pasting image form one tab to other tab, You will learn simple usage of mask and color range, so let’s go ahead and start creating 3D wooden Text in Photoshop
How to create 3D wooden Text in Photoshop?
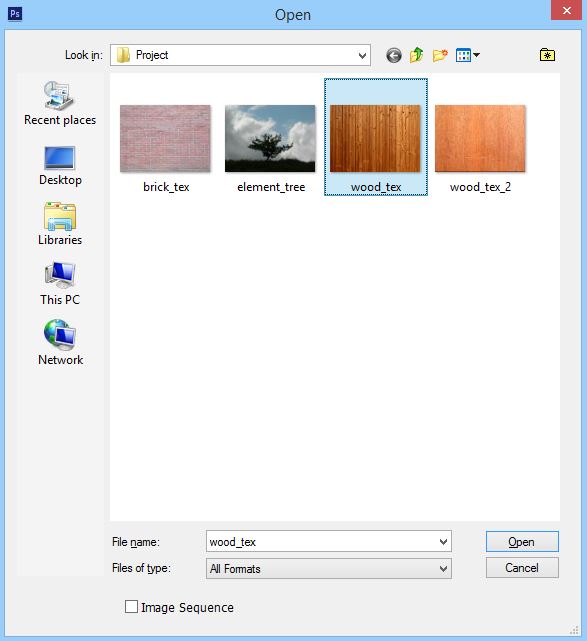
1. Press Ctrl+N to create a new document by 1200 pixel width and 600 pixel heights, and then press Ctrl+O to open, Open dialog box and select wood_tex file.
2. Although there are many methods to copy an image, but I want you to know more about tips and tricks of Photoshop.
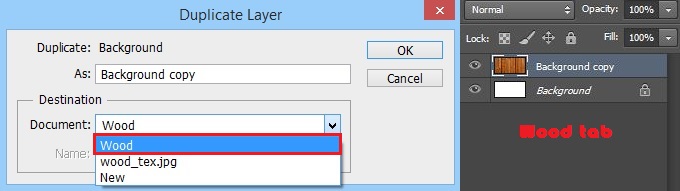
For coping wood tex go to layer and then select Duplicate layer, a new window will appear which is known as Duplicate Layer, but instead of selecting wood tex, select wood in Destination and click OK.
After clicking Ok go to wood tab, there you can see, your image was being copied and pasted to the wood tab without wasting too much time by pressing Ctrl+ A, Ctrl+ C and Ctrl+ V on the keyboard.
3. It seems the image which we copied is too large. For making it small or fit with the image press Ctrl+T to enable Free transform and then press Alt+Shift to enable aspect ratio, for making it small form its middle.
4. Next Press T on the keyboard to select Type tool, but remember select Horizontal type tool.
Note: First time while pressing T on the keyboard, it will select Type Tool, but for selecting other types of type tool press Shift+T, until you select Horizontal type tool.
5. After selecting Horizontal type tool type anything you want like preview article. After typing press enter on the keyboard or check it in the control panel of type tool under the menu bar, and your text shape will change to selection.
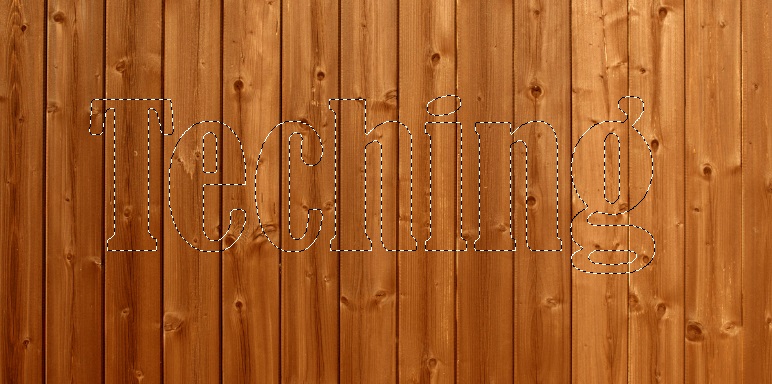
6. For creating your text like wood, press Ctrl+C and then Ctrl+V to paste it. Now you can delete or hide, wood background. Till here your project will look like this.

7. Here we need to create 3D Effect in our text. For creating 3D effect press Ctrl+J to copy and paste it above its own layer. And then go to layer panel, press Ctrl and click on the text layer to load selection,then press D on the keyboard to select Default color in foreground and background, which is white and black and white color, and then press Alt+backspace to fill with black color.
8. Here we need to create shadow in our project. Press Ctrl+T to enable Free transform, press Alt+Shift to rize it.
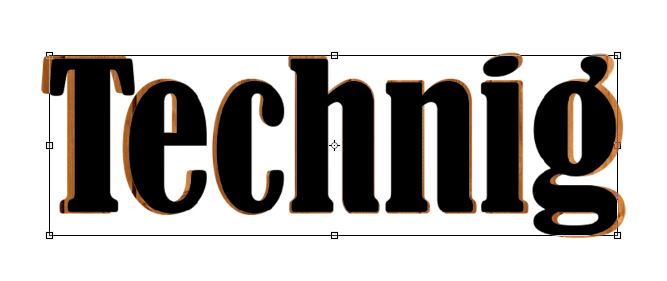
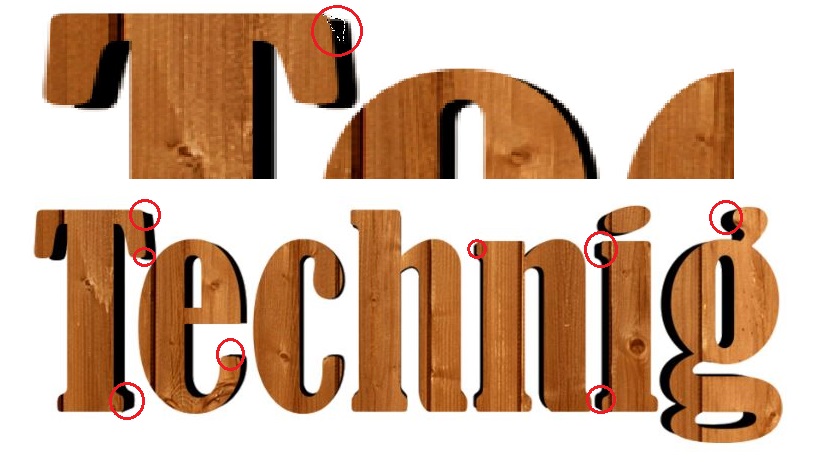
9. Put it under the wooden text to look like shadow, and then select polygonal lasso tool, and then create a new layer set selection to the corner of text and change its shape like this.
Note: Remember to change them those places which I circled with red color in capture image.
10. Press Ctrl+O to open, Open dialog box and open wood_tex3. Here you can fallow step 2 to copy it, and put it in in our project.
11. Go to the shadow text which we copied before in step 8 for creating shadow. Again go to layer panel press Ctrl on the keyboard and click on the shadow layer to load selection, and then go to wood_text3 layer, press Ctrl+J to duplicate the selected area.
Here you can see it shadow has been changed to wood.

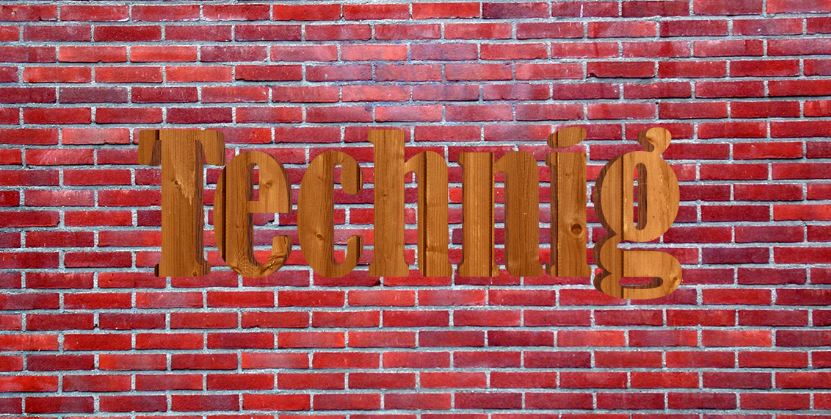
12. Again press Ctrl+ O to open, Open dialog box, but this time select brick_tex image to put it as its background. After opening, it will move automatically in its own tab, for bring that into your project go to layer-duplicate layer and select its destination to your project. If you had problem in this part. You can visit part 2 which was completely explained.
13. In layer panel we do not need any more other image except these three layers, which is Technig, Shadow which I have renamed Bevel and our background.
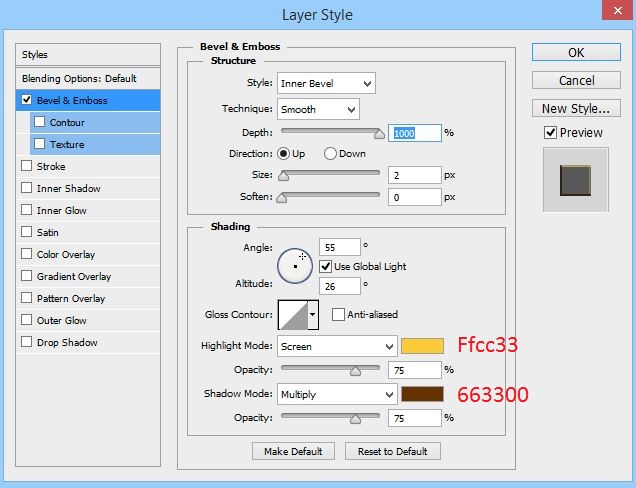
14. For looking more attractive we need to apply some more effects in text to look more like 3D. I will start applying more effects by going to Blending options of Technig layer, and apply these settings.
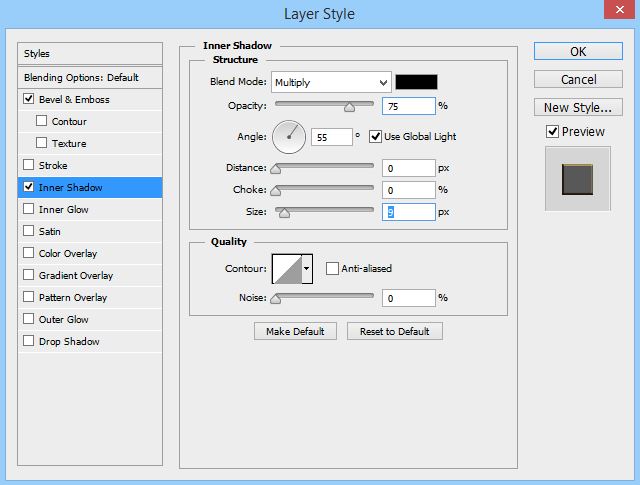
After applying those settings go to Inner shadow and apply these settings.
15. In this step I want to create shadow of the both type tools. In order to do this, create a new layer and then press Ctrl on the keyboard and click on the technig layer to load selection, again while Ctrl was pressed, press Shift and then click on the Bevel layer to load selection of both layer.
While selection was loaded press D on the keyboard to apply default color settings in foreground and background which is white and black, and then press Alt+ Backspace to fill with black color the selection. And put this layer under both of teching and bevel layer.

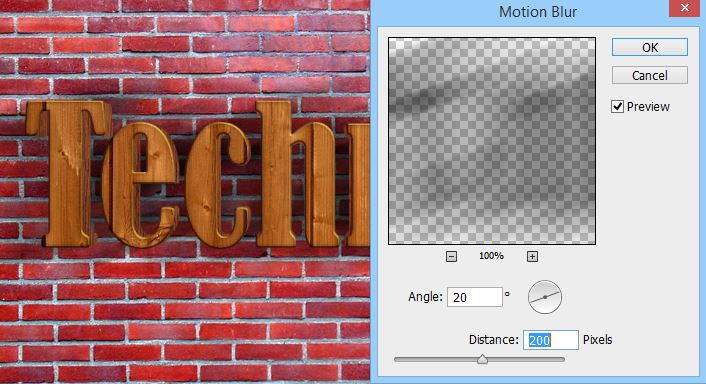
16. We need this shadow to look like a shadow not like this, in order to do this, go to Filter-Blur-Motion blur and apply these settings.
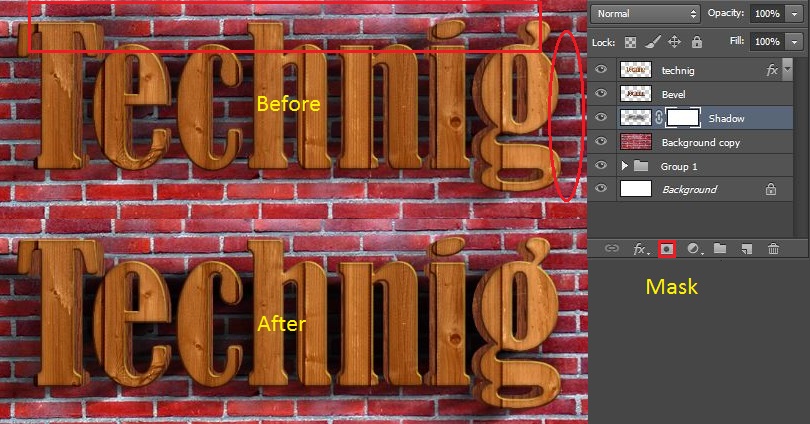
17. Somehow this shadow does not seem too nice, we need to erase some parts of it. We can erase it either by Eraser or mask. I recommend you to use mask because it gives the ability to come back if anything was wrong.
For creating mask click on icon in Layer panel and remove those places which I circled. Also press Ctrl+J to Duplicate shadow layer to look darker.
You can apply more effects to look more attractive, I had applied more effects, but due to, it will be so long I will stop Writing here, but If anyone wants to know more affects they can feedback in comment and I will introduce different other tips.
I Hope you have created your own name by following these step by step guide to create 3D wooden text in Photoshop.
Hello, Dear Ghulam Abbas!
You have really worked hard on this article and I’m really really happy that you provide such amazing article on technig.
Keep it up and I wish you all the best, my dear.
Thanks Dear Mukhtar