I have decided to introduce you this week with some anonymous effects or typography of layer effects here inside Photoshop. Like my preview Photoshop Tips articles, in this post I’m trying to create glass effect text using Photoshop. You can create your own name or company name using this step by step article.
Mostly you have seen different types of layer Effect all around you in world of Graphic for Example:
Typography with fire, Outline Typography, chrome text typography and many others. In this nugget I will be showing you how simply you can create glass effect using Photoshop with your name. Before starting this project, you need to understand What is Layer Effects?
Photoshop layer styles are a popular way to add effects, such as drop shadows and strokes, to layers in a non-destructive way. With the right knowledge and experience, any effect can be achieved. To achieve these effects, however, you need to understand what each setting does and how they can be combined to achieve a certain look.
Create Glass Effect Text Using Photoshop
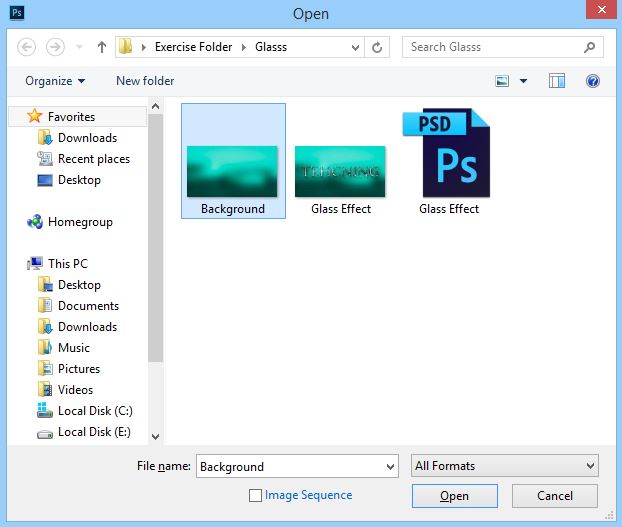
1. Press Ctrl+O to open, Open dialog Box and select Background to open in Photoshop. My background is not pretty good, but you can choose some attractive background for you own glass effect text.
2. Press T or select Type Tool form shapes section, then type anything you want.
Note: From font section select AJenson Pro-Bold font. If you don’t hvae installed this fond, try to download it from Google.

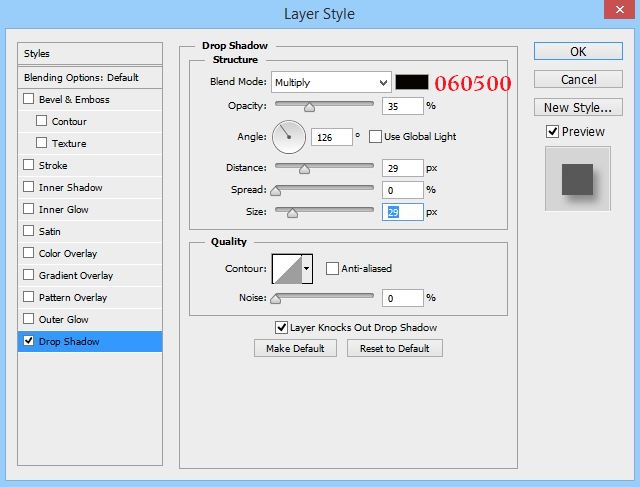
3. Go to layer Panel select technig layer, right click select Blending Options, for Drop shadow apply settings.
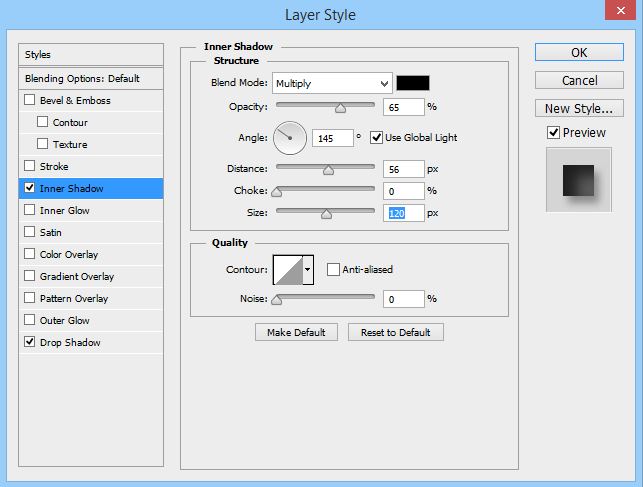
For Inner shadow apply these settings.
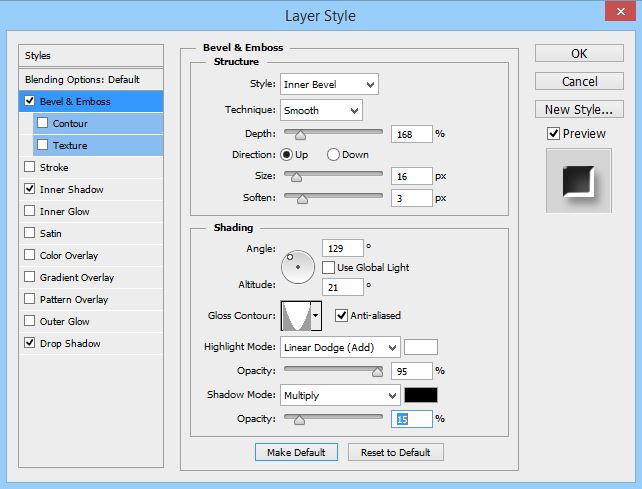
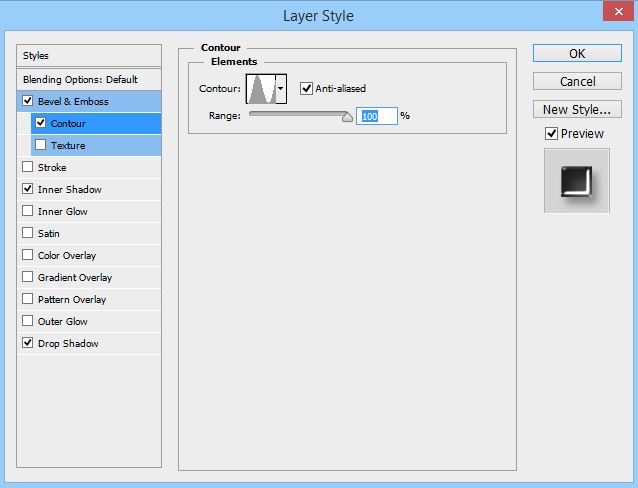
For Bevel and Emboss apply these settings.
For Sub Menu of Bevel and emboss which is Contour apply these settings and click OK.
4. Till here your Project is created. For looking more attractive and beautiful like glass, go to background layer, duplicate it by pressing Ctrl + J on the keyboard, also you can blur its background by navigating to Filter- Blur- Gaussian Blur. Put the copy layer to the top and then press Ctrl+Alt+G or navigate to layer- Create clipping mask.
What is Clipping Mask?
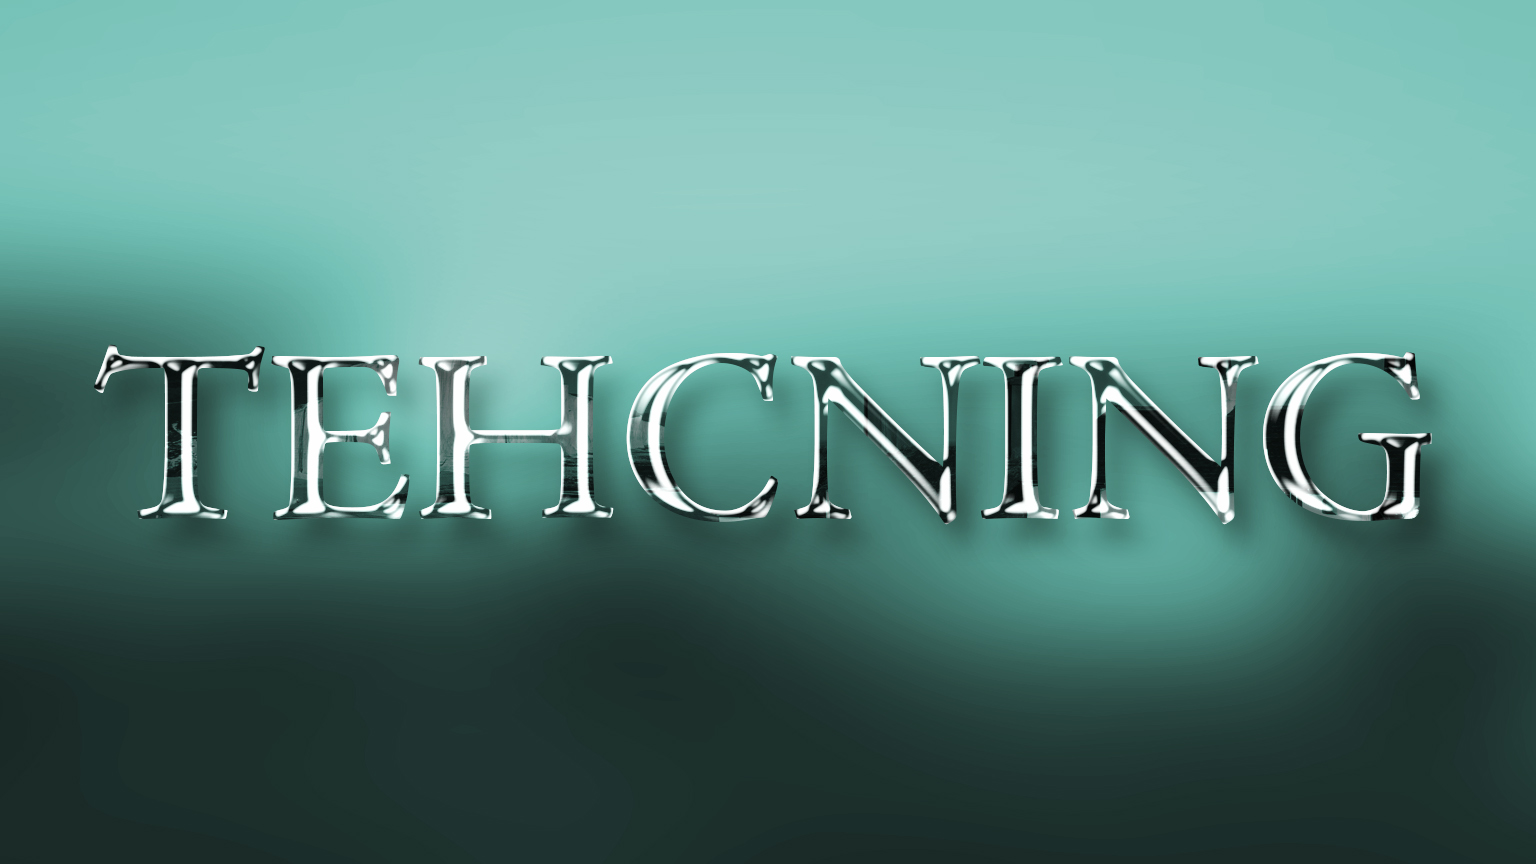
A clipping mask is a group of layers to which a mask is applied. The bottommost layer, or base layer, defines the visible boundaries of the entire group. For example, suppose you have a shape in the base layer, a photograph in the layer above it, and text in the topmost layer. After clipping Mask your Project will look like this.
I hope you like this project and you have created your own name with this typography project. If you had any question so please feel free and ask them, I’m here for helping you.