The Windows 10 Storage Spaces helps protect your data from drive failures and extend storage over time as you add drives to your PC. You can use Windows 10 Storage Spaces to group two or more drives in a storage pool and then use capacity from that pool to create virtual drives called storage spaces. These storage spaces typically store two copies of your data, so if one of your drives fails, you still have an intact copy of your data. If you run low on capacity, just add more drives to the storage pool.
Windows 10 Storage Spaces Requirement
To use Windows 10 Storage Spaces, at least you need two extra drives (in addition to the drive where Windows is installed). These drives can be internal or external hard drives or solid-state drives. You can use a variety of types of drives with Storage Spaces, including USB, SATA, and SAS drives.

Release Articles:
Before you configure and setup Windows 10 storage spaces, you should connect the hard disks to your computer. It is the necessary step because you are going to group two or more hard Disks with Storage Spaces feature.
- Add or connect the drives that you want to group together with Storage Spaces.
- Type Storage Spaces in the search box, and select Storage Spaces from the list of search results.
- Select Create a new pool and storage space.
- Select the drives you want to add to the new storage space, and then select Create pool.
- Give the drive a name and letter, and then choose a layout. Two-way mirror, Three-way mirror, and Parity can help protect the files in the storage space from drive failure.
- Enter the maximum size the storage space can reach, and then select Create storage space.
- Done.
1. To open the Windows 10 Storage spaces, just type Storage Spaces on Windows 10 search box to find Storage Spaces and manage. Click Storage Spaces to open storage space.
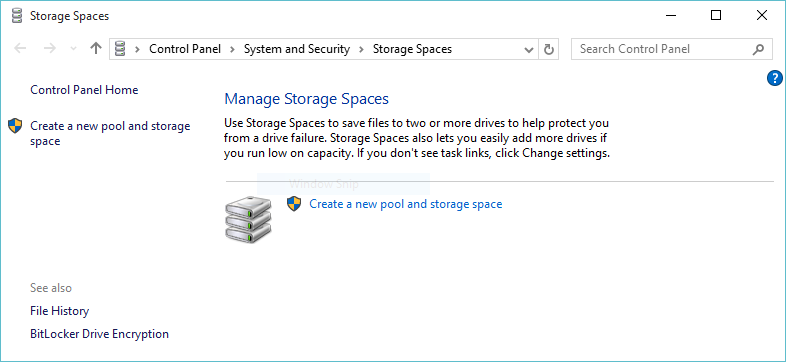
2. On the Manage Storage Spaces window, select Create a new pool and storage space. It will create a pool and group hard disks together to create new virtual drives.
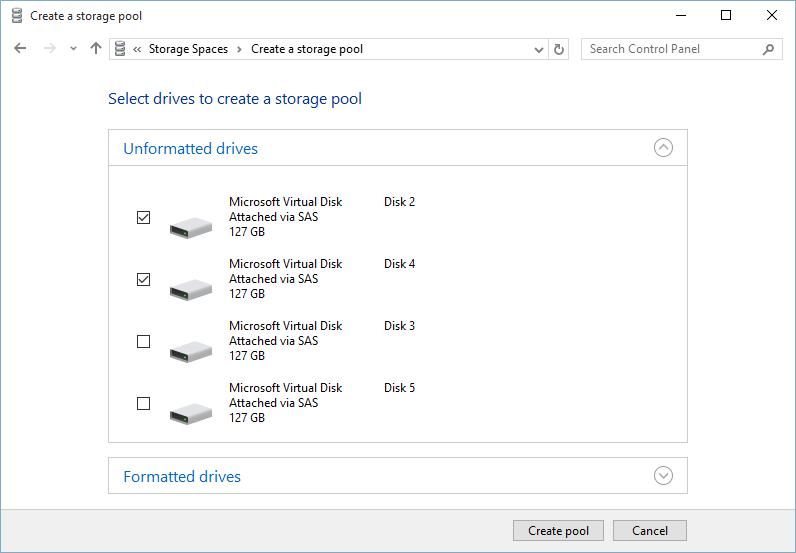
Here I have four hard disks on my Windows 10 computer. These hard disks are virtual hard disks, and I’m testing Storage Space on Hyper-v within a Virtual machine to write this article. Its a virtualized environment for server virtualization and networking virtualization.
Related Articles:
3. Select the hard disks you want to create a pool and group together. I have selected disks 2 and 4. When you have selected the hard disks, click Create pool.
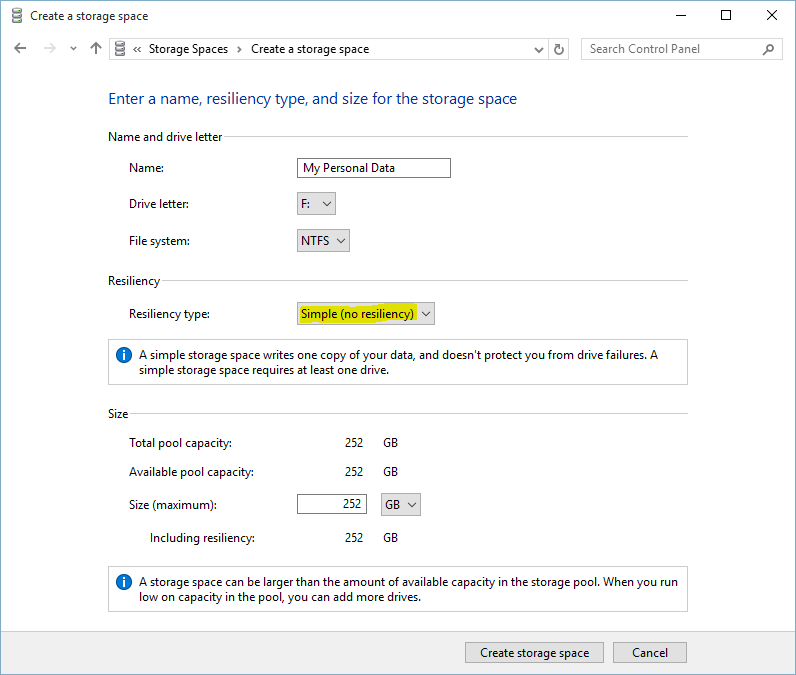
4. Now on the Create a storage space page, type a name for the drive, select drive letter from Drive letter, select File system (NTFS), choose Simple (no resiliency) as resiliency type, and specify the size of the virtual hard disk then click Create storage space.
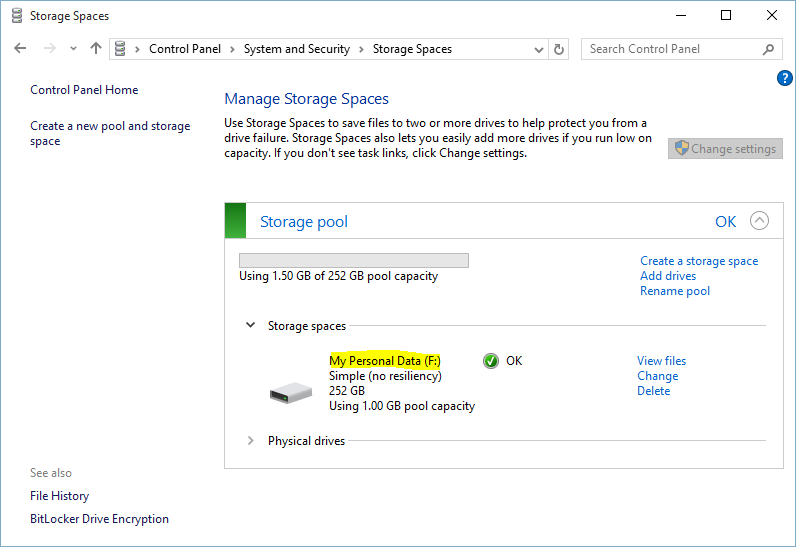
The Storage space drive has created successfully. It’s possible to view files, make changes and even delete the drive from Manage Storage Space section.
How to Remove a Drive from a Pool?
If you created a pool in Windows 10 or upgraded an existing pool, you’ll be able to remove a drive from it. The data stored on that drive will be moved to other drives in the pool, and you’ll be free to use the drive for something else.
- Type Storage Spaces in the search box, and select Storage Spaces from the list of search results.
- Select Change settings > Physical drives to see all the drives in your pool.
- Find the drive you want to remove and select Prepare for removal > Prepare for removal. Leave your PC plugged in until the drive is ready to be removed. It could take several hours, depending on how much data you have stored there.
- (Optional) To speed up drive preparation, prevent your PC from going to sleep. Type Power and sleep in the search box on the taskbar, then select Power & sleep settings. When plugged in, PC goes to sleep after, choose Never.
- When the drive is listed as Ready to remove, select Remove > Remove drive. Now, you can disconnect the drive from your PC.
Which one Simple, Mirror, or Parity Space?
You can create simple spaces, mirror spaces, and parity spaces. Read the differences on the below-detailed description.
- Simple spaces are designed for increased performance but don’t protect your files from drive failure. They’re best for temporary data (such as video rendering files), image editor scratch files, and intermediary compiler object files. Simple spaces require at least two drives to be useful.
- Mirror spaces are designed for increased performance and protect your files from drive failure by keeping multiple copies. Two-way mirror spaces make two copies of your files and can tolerate one drive failure, while three-way mirror spaces can tolerate two drive failures. Mirror spaces are suitable for storing a broad range of data, from a general-purpose file share to a VHD library. When a mirror space is formatted with the Resilient File System (ReFS), Windows will automatically maintain your data integrity, which makes your files even more resilient to drive failure. Two-way mirror spaces require at least two drives, and three-way mirror spaces need at least five.
- Parity spaces are designed for storage efficiency and protect your files from drive failure by keeping multiple copies. Parity spaces are best for archival data and streaming media, like music and videos. This storage layout requires at least three drives to protect you from single drive failure and at least seven drives to protect you from two drive failures.
After you upgrade to Windows 10, we recommend that you upgrade your existing pools of Windows 10 storage spaces. With an updated pool, you can optimize drive usage and remove drives from pools without affecting the pool’s protection from drive failure.