You can run your workloads on Hyper-V, then easily migrate them from on-premises to a Windows Server virtual machine in the cloud. Deploy applications on multiple operating systems with best-in-class support for Linux on Hyper-V. So, you have a great option in Windows 10 make a virtualization lab for practising virtualization. Are you ready to enable and configure Hyper-V on your Windows 10 for practising in a virtualized environment?
What is Hyper-V in Windows 10?
The Microsoft Hyper-V, formerly known as Windows Server Virtualization, is a native hypervisor; it can create virtual machines on x86-64 systems running Windows. Starting with Windows 8, Hyper-V superseded Windows Virtual PC as the hardware virtualization component of the client editions of Windows NT. A server computer running Hyper-V can be configured to expose individual virtual machines to one or more networks.
Microsoft Hyper-V was first released alongside Windows Server 2008 and has been available without charge for all the Windows Server and some client operating systems since. Now you can use Hyper-V on Windows 10 that make client operating systems and server virtualization easy. Fortunately, the latest version of Hyper-V on Windows 10 support Linux operating systems as well. Now you can create an open network environment with Windows and Linux.

Enable and Configure Hyper-V
Hyper-v is not a downloadable and installable virtualization software like VMware or VirtualBox. It is a Windows 10 built-in feature that can be easily enabled and disabled.
Hyper-V System Requirements on Windows 10:
- Windows 10 Enterprise, Professional, or Education
- 64-bit Processor with Second Level Address Translation (SLAT).
- CPU support for VM Monitor Mode Extension (VT-c on Intel CPU’s).
- Minimum of 4 GB memory.
The Hyper-V role cannot be installed on Windows 10 Home. You must upgrade from Windows 10 Home edition to Windows 10 Professional for creating a Hyper-v virtualized environment. For more information and troubleshooting, see Windows 10 Hyper-V System Requirements.
To install Hyper-V on Windows 10:
- Open Windows Features.
- Enable Hyper-V option.
- Restart your computer.
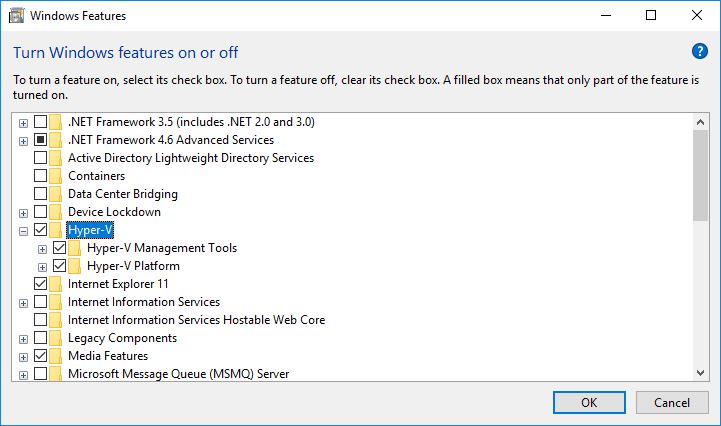
1. Press Windows+R keys on the keyboard to open Windows Run. And type “optionalfeatures” and press enter to open Windows Features. Then select Hyper-V from Windows features and click OK to enable Hyper-v on Windows 10.
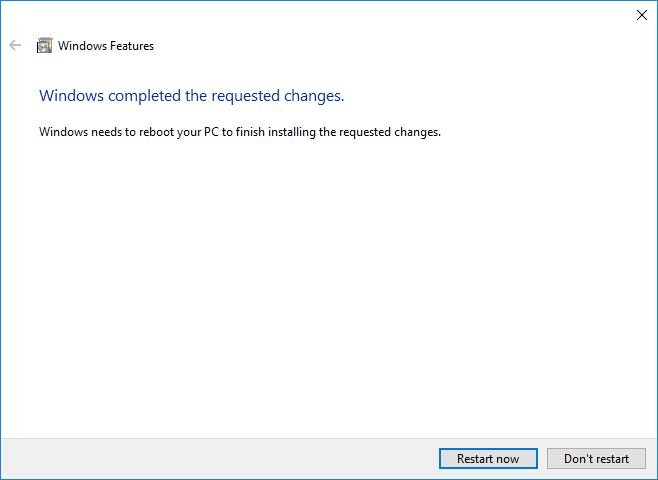
After enabling Hyper-v on Windows 10, it prompts to restart your computer for applying the Windows changes. Just save your works and click Restart now to restart your PC.
That was using GUI for installing and configuring Hyper-V on Windows 10. But Hyper-V has some PowerShell commands as well. Let’s test how to enable Hyper-V using PowerShell on Windows 10 and Windows Server?
Enable Hyper-V Using PowerShell:
Open a PowerShell console as Administrator and run the following command:
Enable-WindowsOptionalFeature -Online -FeatureName:Microsoft-Hyper-V -All
No matter, you have installed Hyper-V using PowerShell command or GUI, you must restart your computer for applying changes.
Enable Hyper-V with DISM command in Command Prompt
This is another command-line option to enable Hyper-V on Windows 10. The Deployment Image Servicing and Management tool (DISM) helps configure Windows and Windows images. Among its many applications, DISM can enable Windows features while the operating system is running.
To enable the Hyper-V role using DISM:
- Open up a PowerShell or CMD session as Administrator.
- Type the following command.
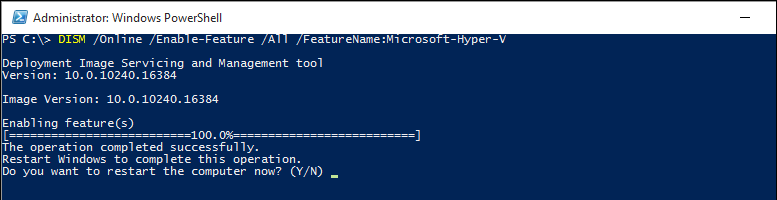
DISM /Online /Enable-Feature /All /FeatureName:Microsoft-Hyper-V
OK.
When you restart your computer, just press type “Hyper-v” on Windows search to find the Hyper-V virtualization software. Yes, check the below screenshot shows the Hyper-V on my computer.
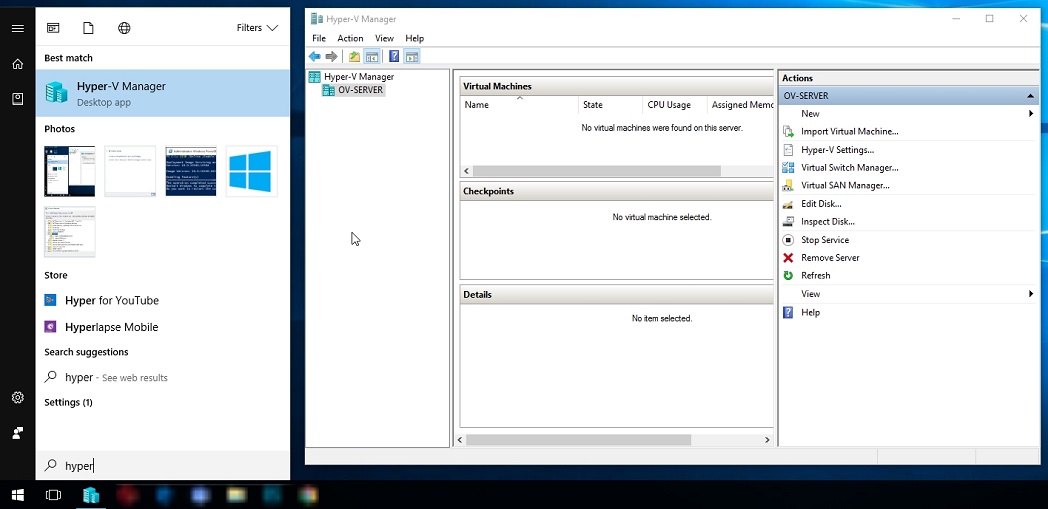
That’s good, your Hyper-v has been enabled and it is ready for server virtualization on Windows 10. The next step is configuring Hyper-v on Windows 10 for server virtualization or practising for the cloud computing network.
Essential Hyper-V Configuration on Windows 10
The below article focuses to configure Hyper-V essential setting for creating a virtualized environment on Windows 10.
Good luck.