When you create a file server, the File Server Resource Manager (FSRM) is a must-have tool. You can use the FSRM to set limits for storage, classify files and folders, and control the types of file(s) you want to store on the file server. Moreover, the FSRM feature is not installed by default on Windows Server 2022 and the previous versions. You can install this feature manually using PowerShell or Server Manager. You will learn how to install the FSRM on Windows Server 2022. Additionally, you will learn how to restrict a folder by storage size and data type.
Install File Server Resource Manager on Windows Server 2022
There are two ways to install this feature on Windows Server 2022:
1. Install Using PowerShell
An easy and quick way to install the FSRM on Windows Server 2022 is using PowerShell.
- Search the PowerShell in the Search box or open it from the Start Menu on Windows Server.
- In the PowerShell window, write:
Install-WindowsFeature FS-Resource-Managerand enter.

It may take a few seconds to install. After the FSRM is installed, you can write the: Get-WindowsFeature |More to check whether it is installed successfully or not. If the installation was completed, you see the X sign in front of its name.
2. Install the FSRM through Server Manager
Another way to install the File Server Resource Manager on Windows Server is via the Server Manager.
- Open the Server Manager in your Windows Server. Click on Manage and Add Roles and Features on the top right-hand side.
- Click on Next in Add Roles and Features Wizard.
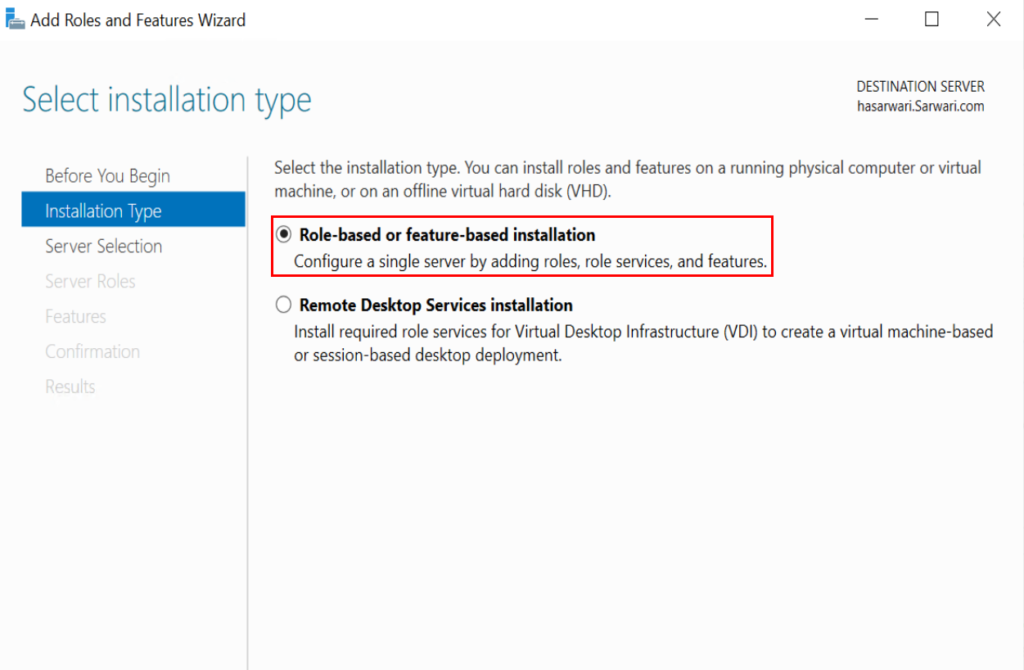
- Select the installation type: Role-based or Feature-based installation, and click Next.
4. Choose the destination server and click next.
5. Find the File and Storage Services feature in the Select Server Roles window and expand it. Under the File and Storage Services, there are two more options. You expand the File and ISCSI Services.
6. Find the File Server Resource Manager feature and select (Check) it, and a new window pop up; click on Add Features, and click next.
7. In the Select Feature window, click Next, and in the Confirm the Installation Selections window, click on the Install button.
After the installation, open the Server Manager. Click on the Tools menu, and see the File Server Resource Manager added there.
Configure File Server Resource Manager
When you open the File Server Resource Manager feature, there are five sub-features under it. You can use those sub-features according to the requirement. In this article, we discuss the most important of them: Quota Management and File Screening Management.
Quota Management
People use Quota Management to limit the space allowed for the volumes or folders and notify the admin or the user via email or other notifications. When you open the Quota Management, there are two other sub-container:
- Quota: This container contains all the existing and upcoming quotas with details.
- Quota template: it carries all the existing and ready templates.
How do create quotas?
- Right-click on the Quota container and click on Create Quota.
- In the Create Quota window, specify the folder path that you want to restrict. You can do it by browsing or writing the path of that folder.
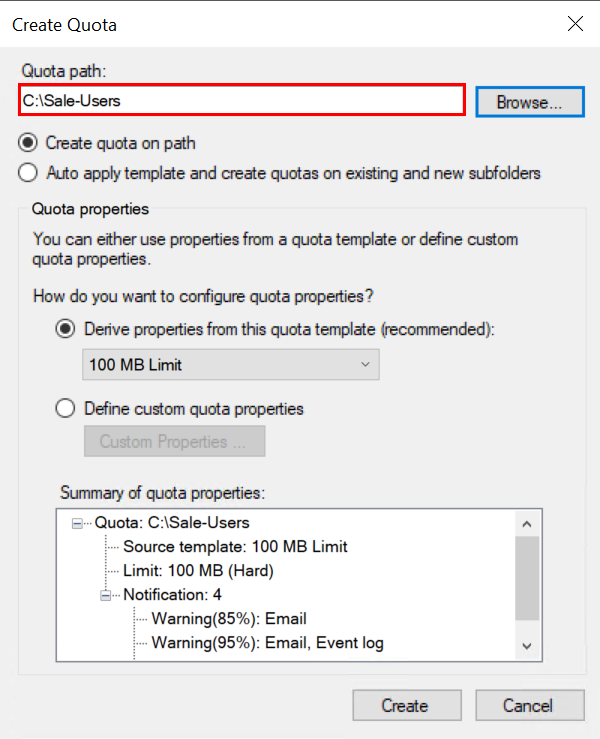
3. In the same window, a question asking how do you want to configure quota properties? Beneath that question, there are two options.
- If you check the “Drives properties from this quota template”, then open the drop-down menu. And select the limited space amount from the existing templates, and click Create.
- Alternatively, if you check the second answer (Define custom quota properties), click on the Custom Properties button. The Custom Properties button lets you specify the quota properties yourself.
4. If you want a custom quota, specify the space limit and types of quotas in the custom properties windows. There are two types of Quotas:
- Hard quota specifies not to exceed the defined amount.
- Soft quota is just for monitoring.
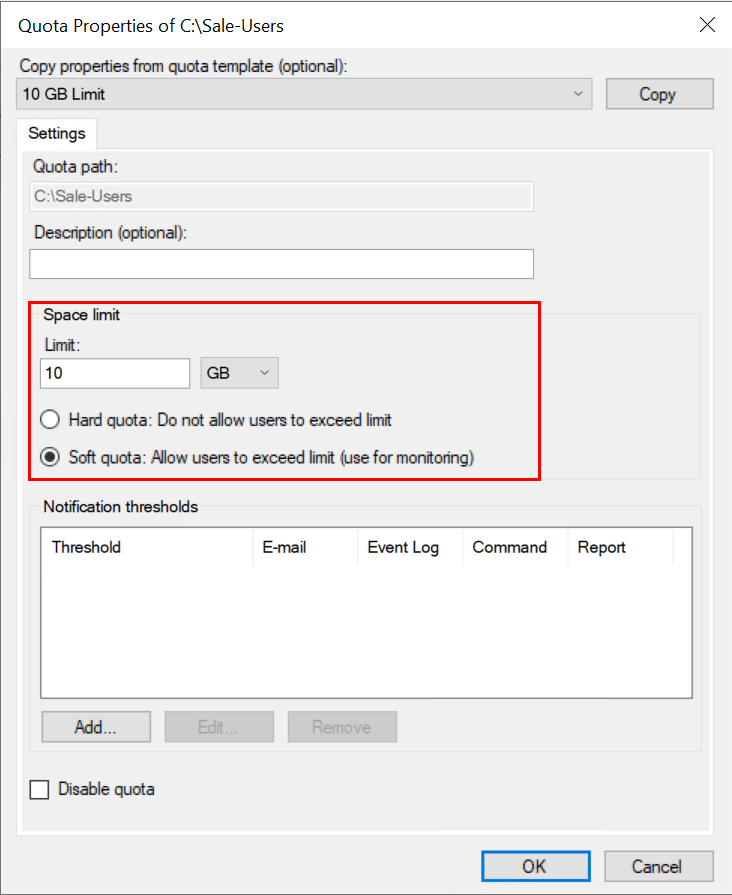
5. Now click on Add button for the notification thresholds.
6. In the threshold window, specify when and how notification should notify the admin or user. And what type of notifications (Email, Event log, Command, or Report) should notify the admin or the user.
7. After defining the type of notification, click Ok to close the threshold windows. Then click again Ok to close the quota properties window. Finally, click on Create button in the Create Quota, and a new window asks you to save the newly created template. If you want to save the template, give it a name and click on Ok. Else, check the Save custom quota without saving the template and click the Ok.
File Screening Management
You can use file screening management to control the types of files users can store in the folder or volumes. If you expand the file screening management, you will see three options:
- File Screen: you can see and create new file screens.
- File Screen templates: it keeps many pre-made templates that you can use.
- The third option is file Group: it consists of files in one group.
How to Create New File Screen
- Right-click on File Screen and click on Create File Screen.
- Specify the path of the folder or volumes you want to implement the restriction.
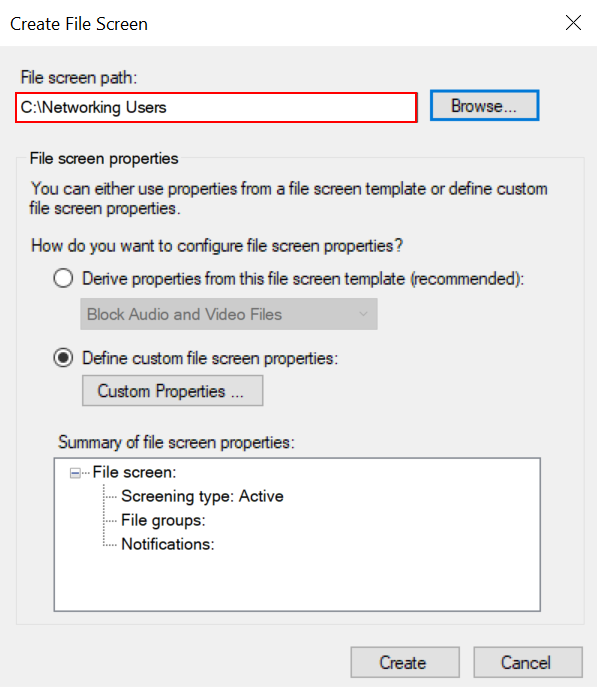
3. Question asking how do you want to configure file screen properties? If you check the Drive properties from this file screen template, open the drop-down menu beneath that and select the type of file you want to ban. Click create. You are done!
4. On the other hand, if you create a custom file screen, check the Define custom file screen properties. And click on the Custom Properties button.
5. In file screen custom properties, define the type of file screens you want. There are two types of file screens:
- Active screening: this type does not allow users to save unauthorized files.
- Passive screening: allow users to save files (It is for monitoring)
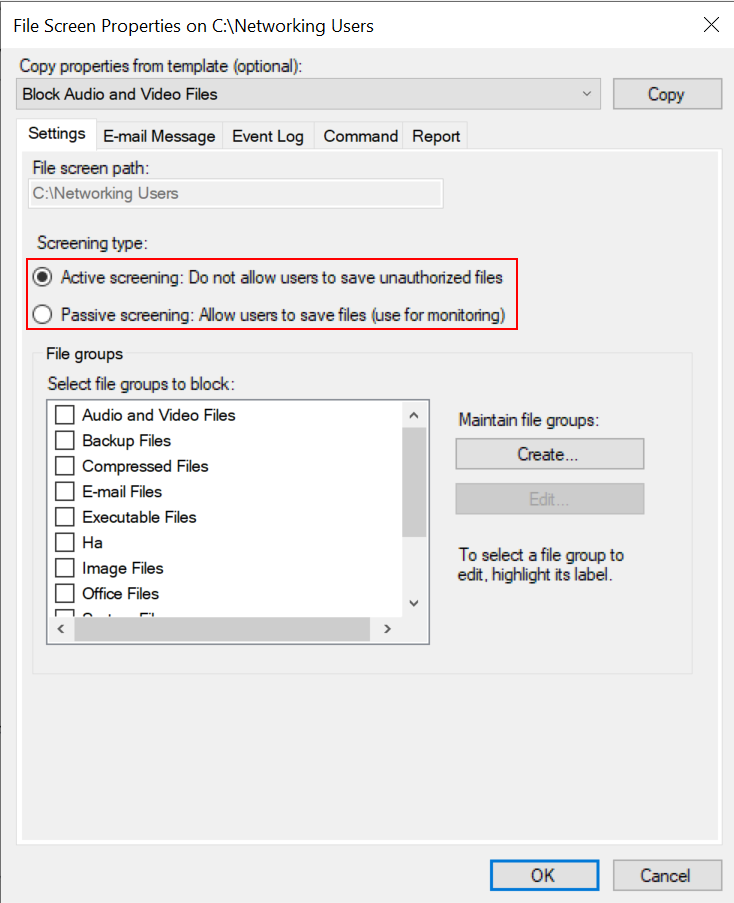
6. Additionally, in the File Screen Custom properties window, click on the Create button if you want to create a new file screen. Or, select one option from the file groups column and click on the Edit button to bring changes to the existing file groups.
7. Define the type of notification (Email message, event, comment, or report) from the top menu and click Ok to close the window.
8. After you customize and select the file screen, click on the Create button. A new window shows up asking do you want to save the newly created template. If yes, give the name and click Ok. Else, check the Save custom file screening without saving the template and click Ok.
The Conclusion
To conclude, File Server Resource Manager is a feature in Windows Server that enables users to have extra monitoring of their files. In the article, you learned how to install the FSRM feature in Windows Server 2022 and limit folder size, and prevent unauthorized files. Write down your questions in the comment section.
You may find the below article useful!
Windows Server 2022 Backup Installation and Configuration
How to Create and Configure Storage Pool on Windows Server 2022