Although the security has been enhanced in Windows Server 2022, users still need to be very careful and protect their data for the Windows Server used in the enterprise environment. Backup is an essential part of Windows Server’s daily administration, and the backup enables you to restore lost data. In Windows Server 2022, you can do the backup using third-party software or built-in tools in the Windows Server environment. We will install and configure the backup using built-in tools in the following article.
You may be interested in reading about Windows 11 Backup and Restore and Windows 10 Backup and Restore.
How to Install Windows Server 2022 Backup features?
Before starting to take a backup of your system and files, you have to install it on your system. There are two ways to install this feature: Windows Server Manager and Command Prompt.
If you want to install the backup feature using Server Manager, follow the below steps:
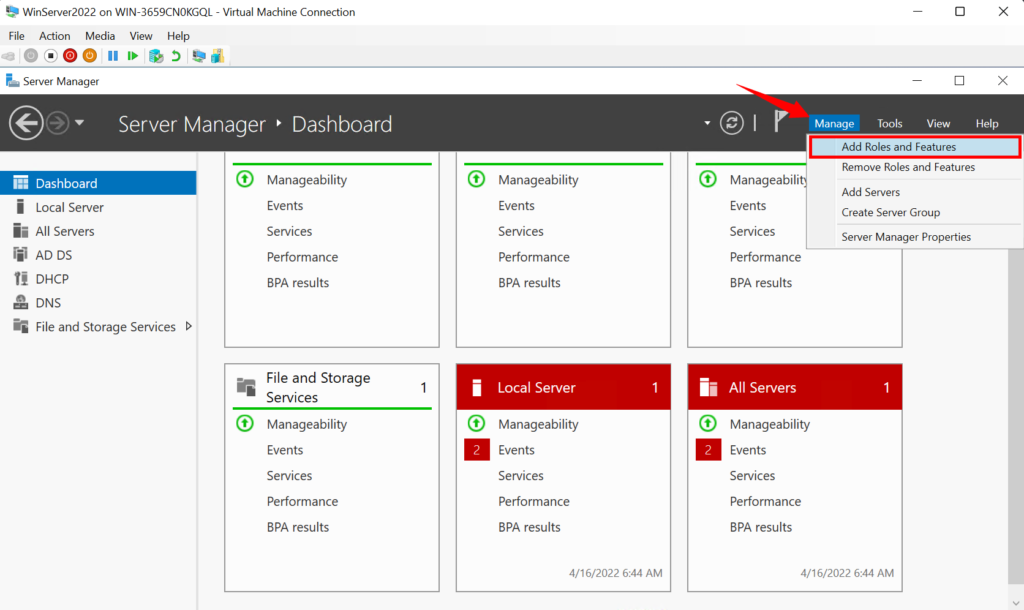
- Open the server manager, click on Manage, and Add Roles and Features in the Dashboard.
- In the Add Roles and Features Wizard, click Next, select the installation type (We go with Role-Based or Feature-Based), and click Next.
- Select the destination server and click next. Pass the server roles by clicking the Next button.
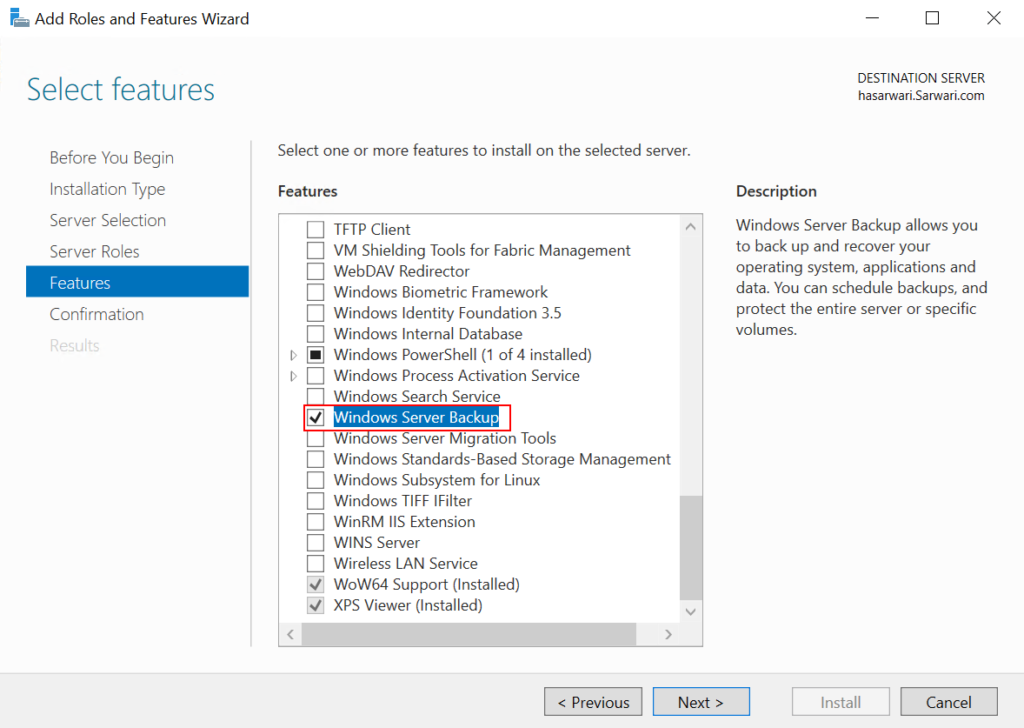
- In the Select Feature window, scroll down, find the Windows Server Backup feature and tick that and click next.
- Finally, confirm the installation, and click the Install button. It takes a few seconds to get installed. Click the Close button.
The second way to install the backup feature is through Command Prompt.
- Open PowerShell in your system by clicking on the Windows PowerShell in the Start Menu.
- Write the
Install-WindowsFeature Windows-Server-Backupin the PowerShell window and Enter. It will take a few seconds to install.
How to configure the Windows Server Backup?
Now that you have installed the backup feature, you can configure the backup in the Windows Server.
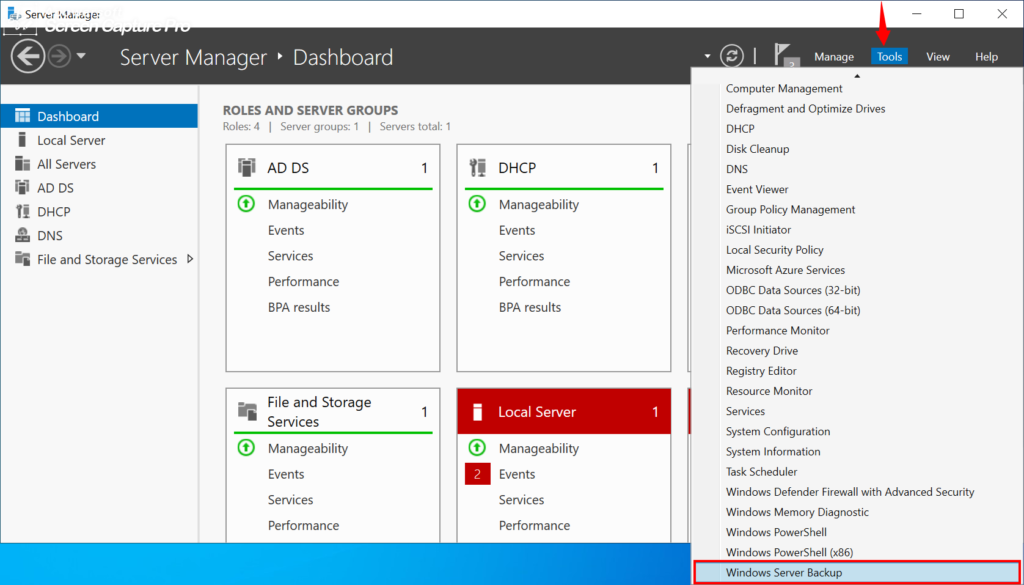
- Search Windows Server Backup in the Search box or Start Menu of your Windows Server and open it. Alternatively, you can open the Windows Server Backup through Server Manager > Tools and scroll down, find the Windows Server Backup and click on it to open.
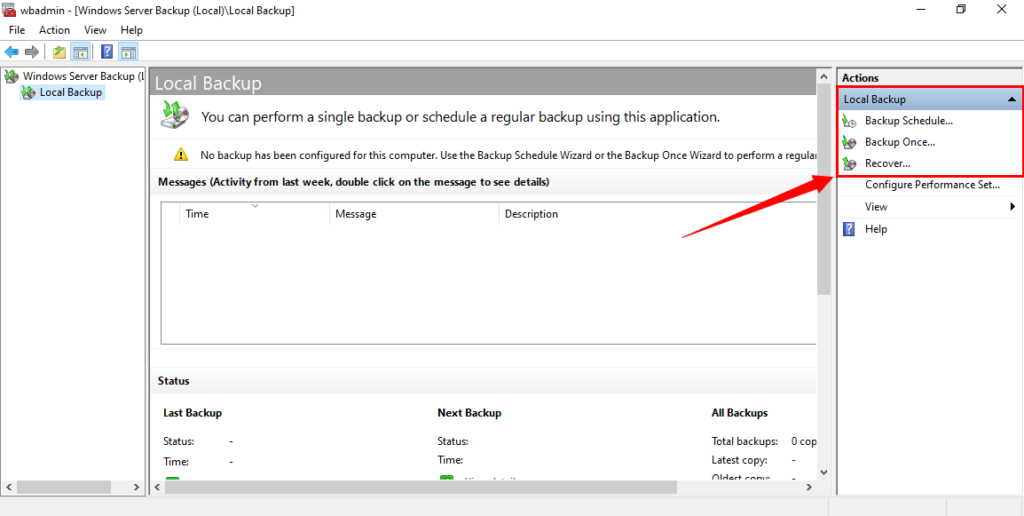
- When the new Window opens, click on the Local Backup on the top-left-hand side.
- Three options are under the Local Backup on the top-right-hand side: Backup Schedule, Backup Once, and Recovery. If you want the system to take a regular backup of your system and data, click on Backup Schedule and schedule the Backup time. Else, click on Backup Once.
- In the Backup once Wizard (Backup Option) window, click next. The new Window asks what type of Configuration you want to schedule. Full Server or Custom. If you’re going to select the custom volumes, files and folders, select the custom and click next and in a new window, add items manually. On the other hand, if you want to back up all your server data, applications, and system states, go ahead with the Full Server options.
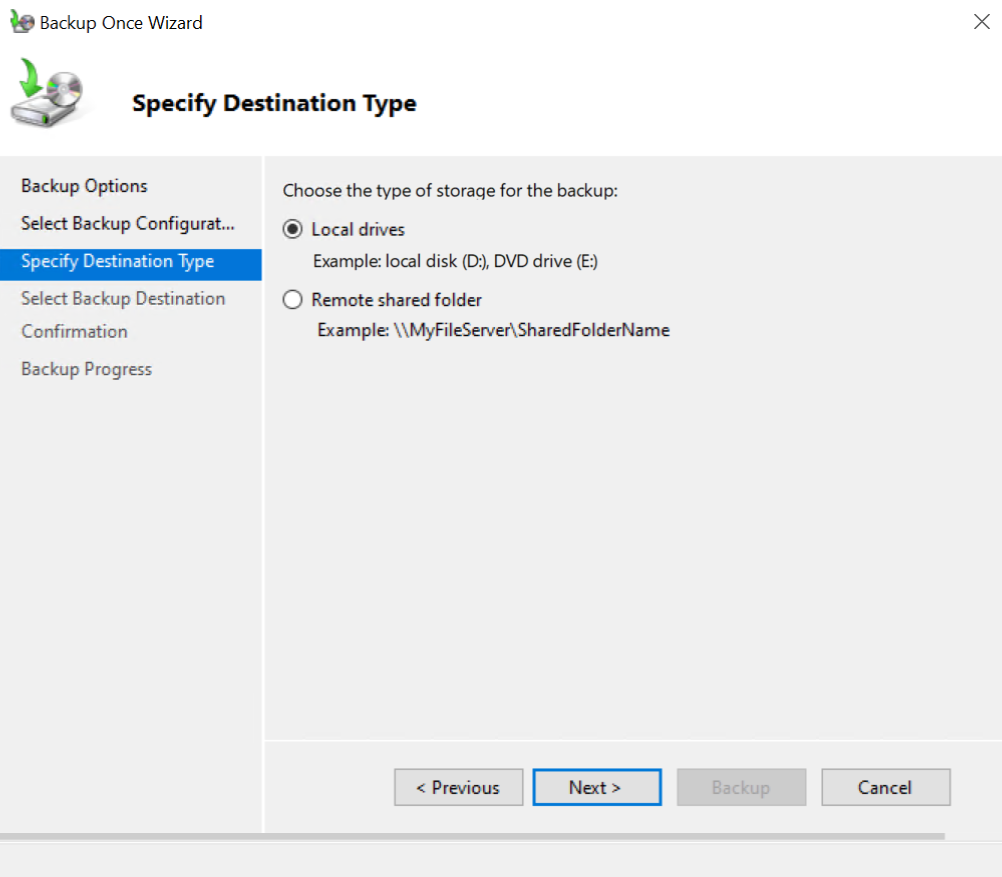
- On the Specific Destination Type window, specify the storage for your backup. You can select the Local drives if you want to save the backup in the local drives of your Windows Server. Alternatively, if you want to save the backup in the Remote Shared Folder, select this option and click next.
- The new Window asks about the location path, opens the file explorer, finds the desired drive, copies the path from the Address Bar, and pastes it in the text box. There are also two options asking whether the backup inherits the access control implemented on that drive or not. Click next.
- Finally, confirm your backup and click on the Backup button. That is going to take time to complete.
Note: If you go ahead with the Backup Schedule, that is also the same; just specify the backup time.
To sum up, there are multi ways to back up the Windows Server 2022. We used the built-in options in Windows Server for backing up to an external hard drive. I hope this article can solve your problems.
There are some exciting related topics that you may like: