Storage management is a critical topic in almost any networked enterprise of any size. An essential part of this topic is to create and configure storage pools. A storage pool enables us to combine multiple dynamic disks as a single large space. We can then create as many virtual disks as we want from that storage pool. We can further partition those virtual disks into multiple volumes. Hence, It is an important and straightforward topic we will cover in this article, mainly focusing on how we can create and configure a storage pool on Windows Server 2022.
In addition to the above topics, we will first discuss how to add virtual disks on VMware virtual machines. This is a prerequisite for configuring storage pools using Windows Server 2022 virtual machine on a VMware workstation, and you do not have multiple physical disks. Briefly saying, we will walk through the followings:
- How to add virtual disks on VMware virtual machine.
- How to create a storage pool on Windows Server 2022
- And how to create virtual disks from the storage pool
If you already know any of the above sections, you can skip them and continue with the section you do not know.
Adding Virtual Disks on Windows Server 2022 VMware Virtual Machine
Before creating and configuring Storage Pools on a Windows Server 2022 VMware virtual machine, We need to add at least two virtual disks. Follow the below steps to do so.
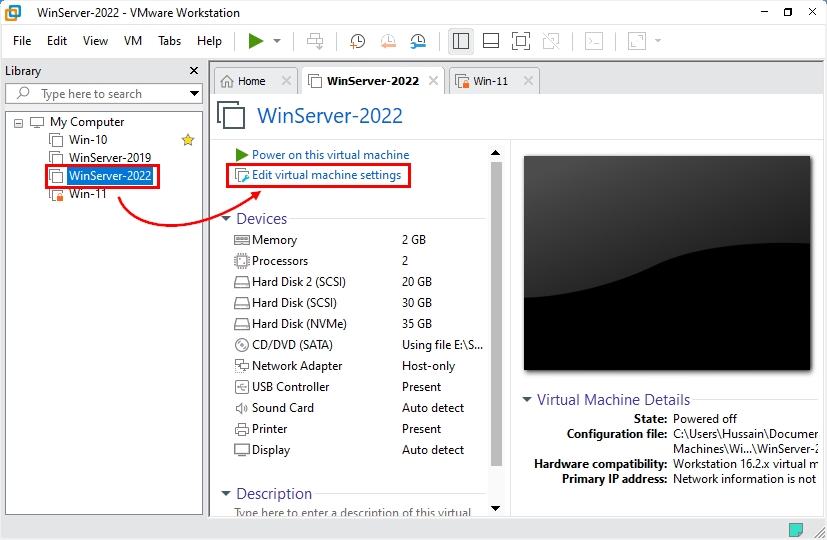
- Shut down your Server 2022 machine if it is running.
- Go to your virtual machine settings. To do so, select the virtual machine, and open the Edit virtual machine settings option.
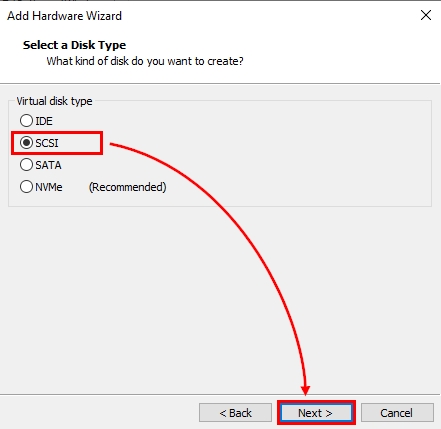
- On the Hardware tab of the Settings window, click on Add. Choose Hard Disk on the new wizard, and click on Next, afterwards.
- Choose the SCSI option as disk type, and click on Next.
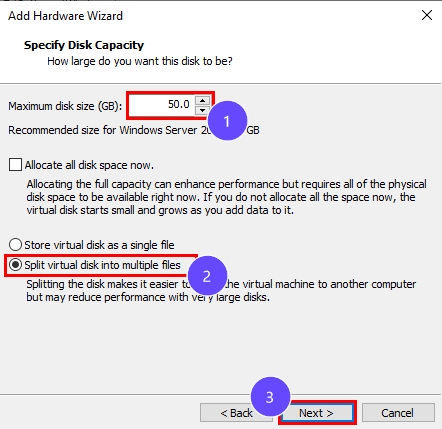
- Check the Create a new virtual disk option and click on Next.
- Specify the maximum disk size for your virtual hard disk. Then, select the Split virtual disk into multiple files. Click on Next, finally.
- Browse for the location where you intend to save the disk files. You can also modify the disk name here. Once set, click on Finish.
To this point, we have added a new virtual disk to our Windows Server 2022 virtual machine. We need at least two disks to create a Storage Pool as we mentioned above. So, following the above steps, add a new virtual disk, and then continue to the next section.
You may also like to read How To Create A Virtual Machine In VMWare.
Creating a Storage Pool on Windows Server 2022
As we said previously, we can combine multiple dynamic disks in one place with a storage pool. We provided the prerequisite in the first section. In this section, we go through the steps to create and configure a storage pool on Windows Server 2022.
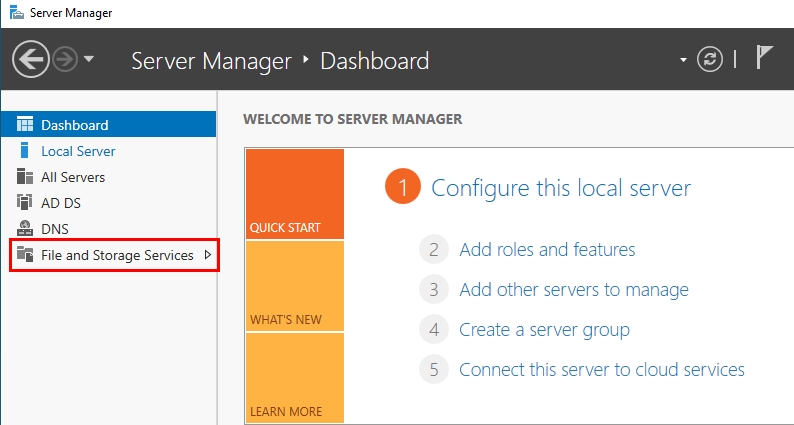
- Open Server Manager on your Windows Server 2022.
- On the left-hand panel, open the File and Storage Services option.
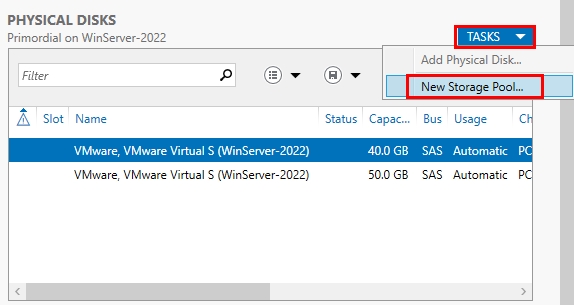
- Select the Storage Pools from the menu. We can see three sections: Storage Pools on the top, Physical Disks on the bottom-right, and Virtual Disks on the bottom-left area. The way the whole process works is to create a pool from the Physical Disks first. Then we can create virtual disks from our storage pool and they will appear in the Virtual Disks section.
- To create a new storage pool, click on the Tasks dropdown menu in the Physical Disks area, and click on New Storage Pool.
- Click next on the Before You Begin section. Name the pool, and click on Next.
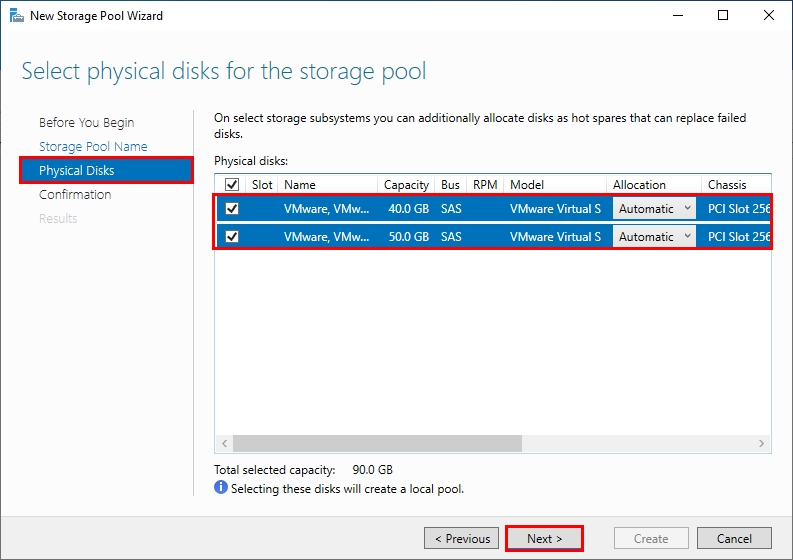
- You can select the disks you use for your storage pool in the Physical Disks section. Choose the disks and click on Next.
- Now, check the summary of the settings. Click on Next if everything is set correctly. Use the Previous button to go back and bring changes if something goes wrong. Finally, click on Close on the Result section.
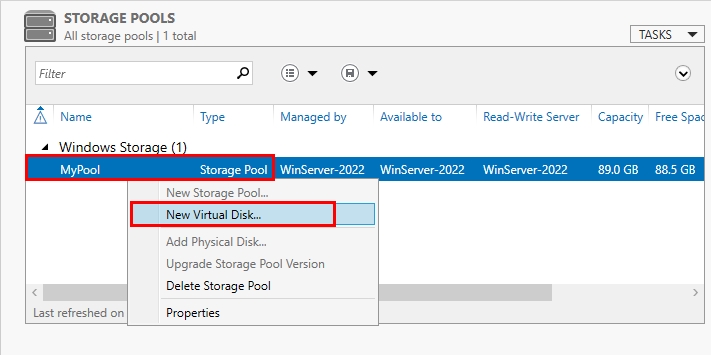
We have built our new storage pool from two disks. The pool we created now shows up in the Storage Pools area, and we can create virtual disks from our pool.
Creating Virtual Disks from a Storage Pool
After creating a storage pool on Windows Server 2022, we can make several virtual disks of varying sizes from it. Let’s walk through the steps.
- Right-click on the intended storage pool and select New Virtual Disk.
- Select the storage pool from the list, and click on OK.
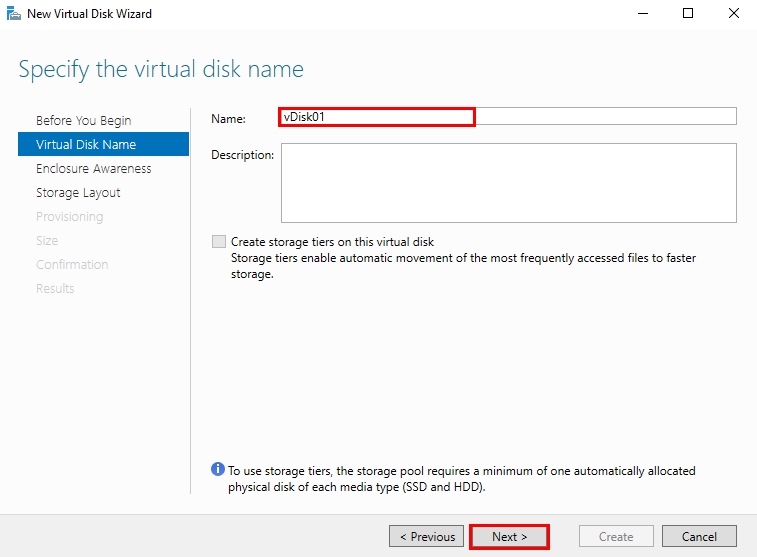
- Click Next on the Before You Begin window. Put the name for your virtual disk, and click Next.
- Select the storage layout that best suits your needs, then click on Next afterwards.
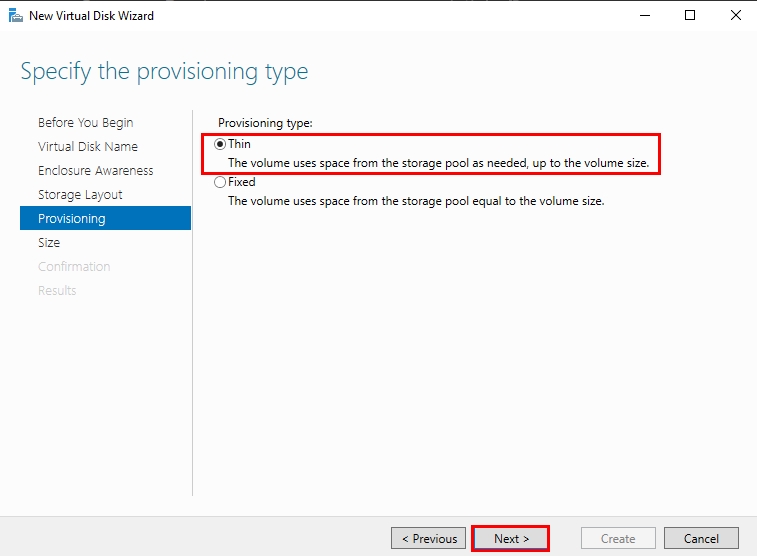
- Choose the provisioning type for your disk, and click on Next. The Thin is always selected as far as it is dynamic. That means the Thin type consumes its defined space only when needed. On the other hand, the Fixed type will consume the whole space designated for it from the very beginning.
- The next step is to specify the size of your disk. Specify it and click on Next. The Maximum size option is greyed out as we chose Thin as the provisioning type.
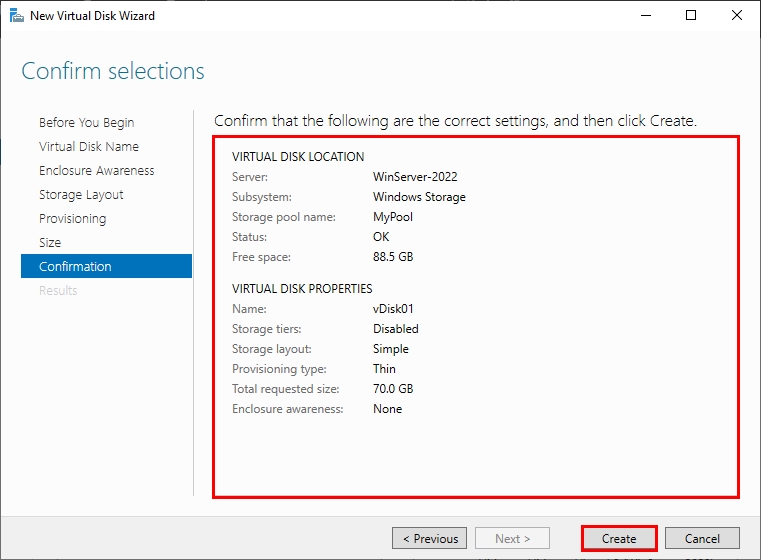
- Now, check out the summary of the settings you defined for your disk. You could use the Previous button to go back and correct the settings if they went wrong. Or click on Create to create the disk. Click on the Close button on the next page.
It was all about how we could create a virtual disk from the existing storage pool on Windows Server 2022. After you have made it, you can see it added to the Virtual Disks area, and you can partition it into volumes.
You may also look for How To Solve Disabled Extend Volume Option In Windows 11?
Summary
So far in this article, we discussed how we could create and configure a storage pool on Windows Server 2022. As we need at least two disks to do so, we first added two virtual disks for our Server VMware virtual machine. Then, we stepped through the steps of creating our storage pool. Consequently, we created a virtual disk from the storage pool.
I hope this article can help you find your answer. If you have any further questions, you can always share us in the comment section.