Set up Remote Assistance Connection in Windows 11, allows you to share your computer screen with another person on the local network or the internet. You can get help from another person to perform a specific task or troubleshoot your computer. You can also assign remote control to another person over the LAN or internet so he can configure your computer.
Enable Remote Assistance in Windows 11
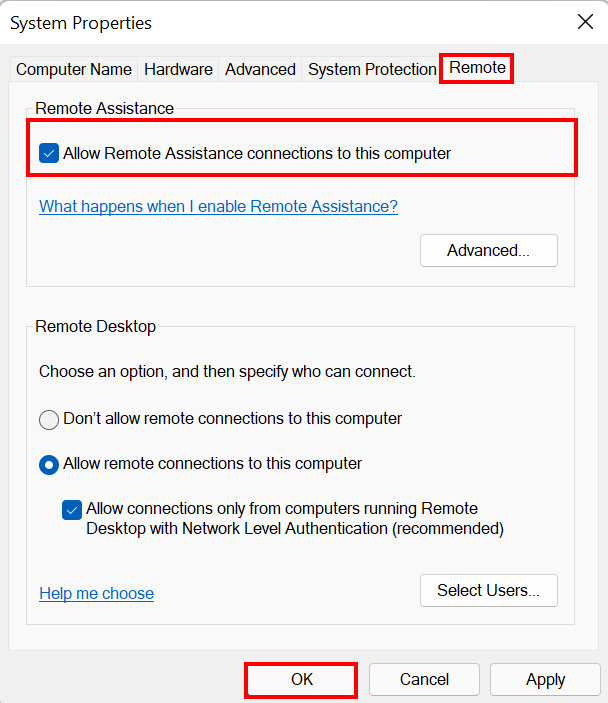
To enable Remote Assistance in Windows 11, go to windows settings, System, About, then click on Advanced system settings. Or type the command sysdm.cpl in the Run, System Properties show will show up. On System Properties, click on the Remote tab, click on Allow Remote Assistance Connections to This Computer, then click OK.
Now that you have enabled Remote Assistance let’s see how to set up a Remote Assistance connection in Windows 11.
Set up a Remote Assistance Connection
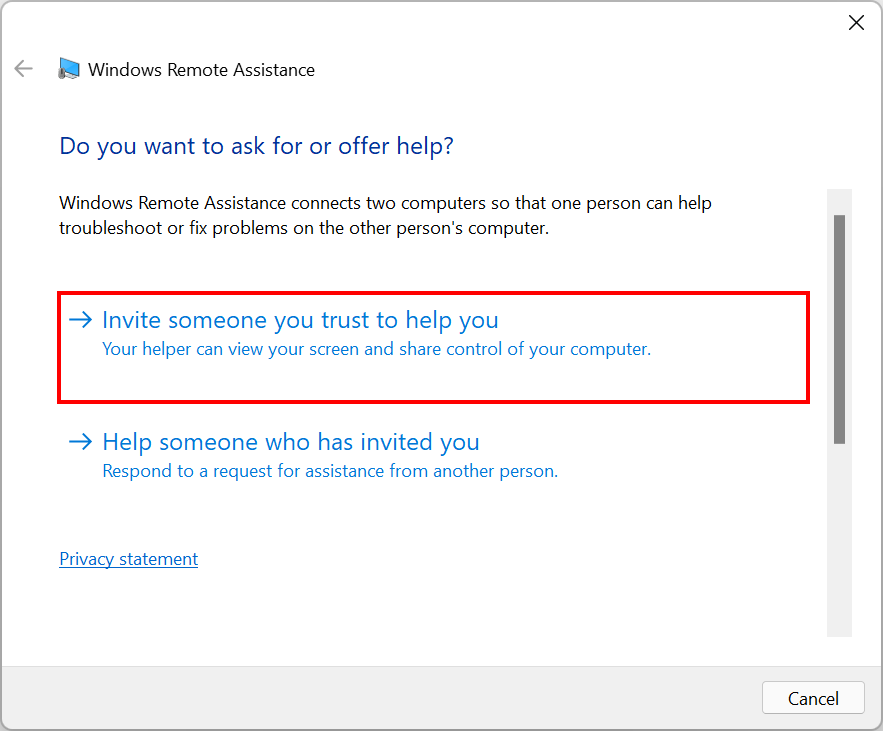
- Search for Remote Assistance in the start menu and click on Invite Someone to Connect to Your PC And Help You. Or search for Run in the start menu, type the command
msrain Run, then click OK.
- Click on Invite someone you trust to help you and ask someone else to help you. If you want to help someone else, then click on Help Someone Who Has Invited You.
- Click on Save this invitation as a file to save the invitation on your computer. Later you can send the invitation through email or any other social media platform.
- Save the invitation password in a notepad file, then send the invitation file and password to the helper. Do not close the Remote Assistance window because it is Waiting For Incoming Connection.

- Open the invitation file on the helper computer, type the password and click OK.
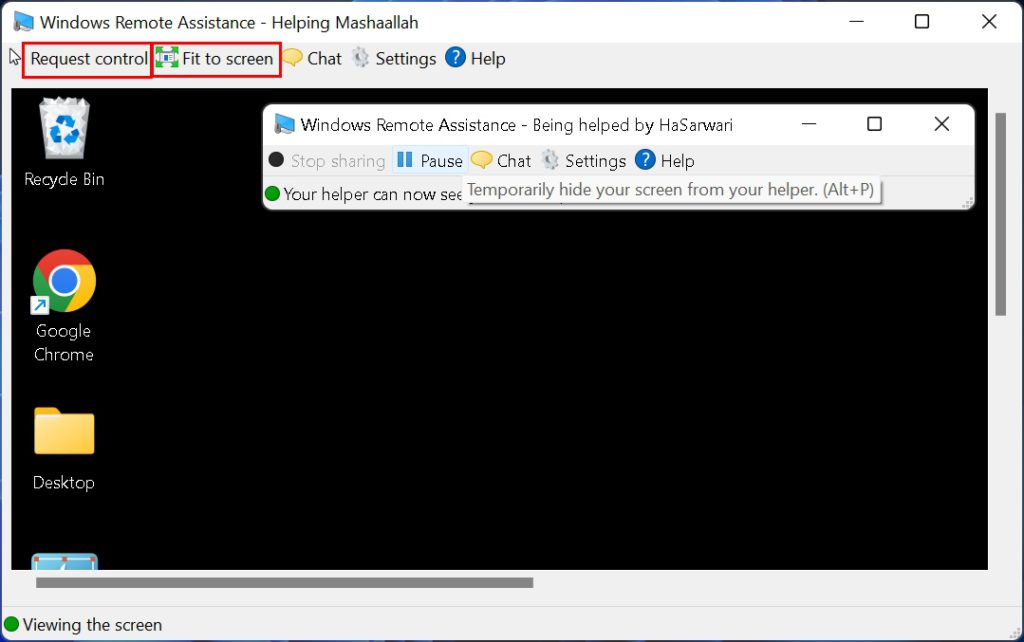
- Click on the Fit Screen to have a better GUI. Click on the Request Control to have remote control access. By default, the helper computer has only monitoring access.
- When the helper computer request remote control, the following screen shows up. Allow the helper computer to have remote control of your computer by clicking on Yes.
Remote assistance is an excellent tool for the computer tech to troubleshoot computers over the Internet. It provides technicians with the ability to have control over clients’ computers. When you give the helper computer full access, that computer can install, uninstall, run, and troubleshoot applications on your computer.
Check out this article for Windows 10 How To Configure Windows Remote Assistance In Windows 10?
To know more about remote assistance protocol click here.