There are too many how-to guides related to fixing set Google maps to address correctly on a website. But most of theme are not works or too complicated.
The error “Oops! Something went wrong. This page didn’t load Google Maps correctly. See the JavaScript console for technical details.” make me crazy. I tried a lot to fix this on my WordPress website. Unfortunately, doesn’t work perfectly.

Let’s fix this issue simply by installing a simple WordPress plugin. Just follow the below step by step guide to set Google map address correctly on your website without end up hiring an expert.
Set Google Maps Address Correctly on a Website
On your website, you can embed a map, Street View image, driving directions, or search into your website or blog. You can share a location or map with others over email, Google+, Facebook, Twitter, or text using this method.
1. Login to your website and install API Key for Google Maps plugin from Plugins section’s of your website and activate it.
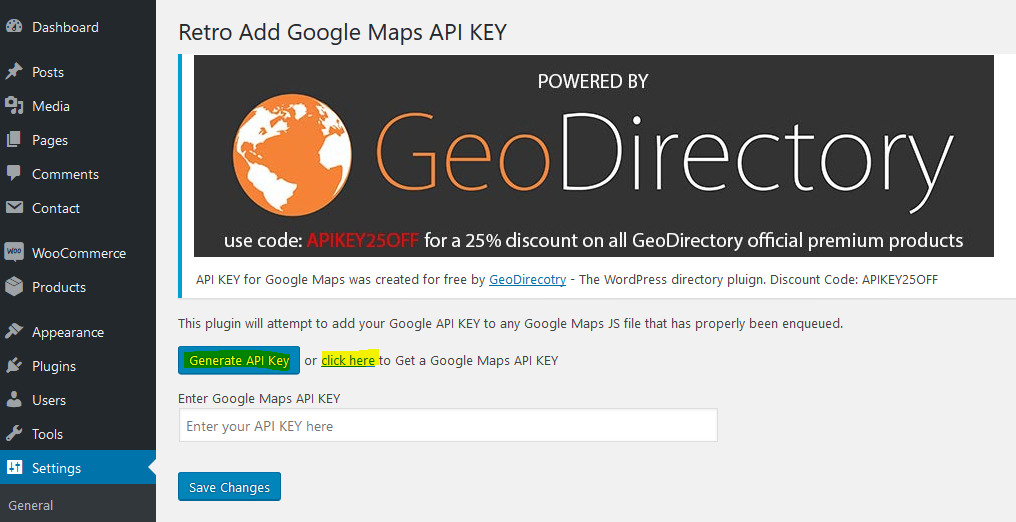
2. Select the Google API Key from WordPress settings and click Generate API Key button or click on click here a link to get a Google Maps API Key.

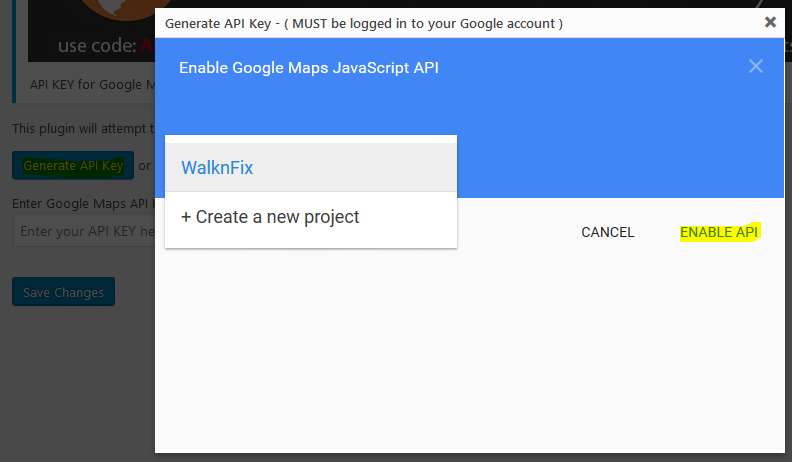
3. You must be log on to your Google account in order to generate API Key. Here I just generate an API key using my Gmail account.

4. Create a new project or select the created project. I have chosen WalknFix project then click ENABLE API.
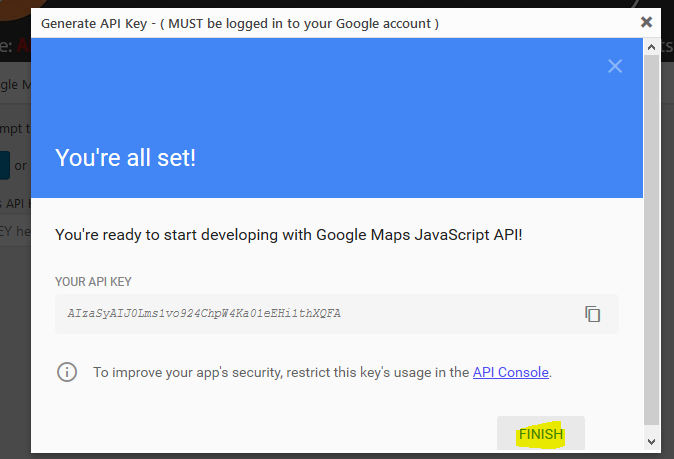
Everything is ready, click API Console in the below screenshot to change the API Key security.

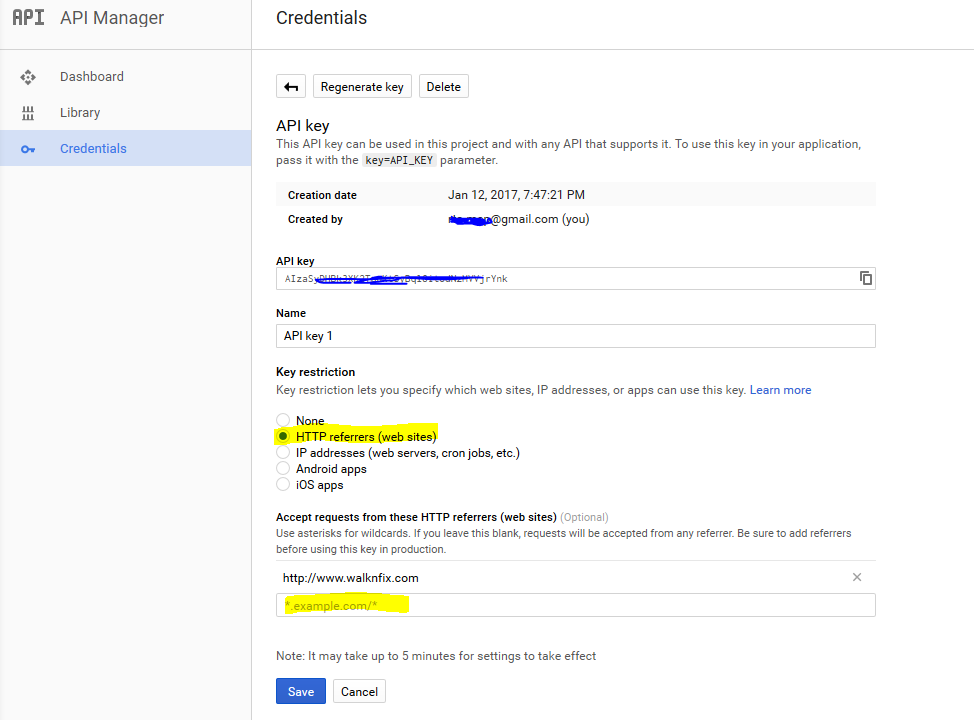
5. Change the key restriction for your website only and add the address of your website on the bottom then click Save to apply the changes.

6. Now, copy the API key from Google API Key manager and past it on the Google Maps API Key WordPress Dashboard and click the Save.
7. Finally, find and add the latitude and longitude of your address on Google Maps using latitude and longitude finder websites.
Related tools you need to create a google map:
That’s all you need to set Google maps address correctly on your website.
