Windows PowerShell has cmdlets that help you manage files with PowerShell easily within Servers and client machines. The following PowerShell articles provide a brief introduction to carrying out file system management tasks by using Windows PowerShell. These tasks include such things as creating, renaming, copying, verifying, and deleting files and folders with PowerShell.
Manage Files with PowerShell
As Sysadmin you already should know the basics of PowerShell command-line structure. Here I’m trying to manage files using PowerShell with some File management cmdlets. So follow the PowerShell articles to learn more.
#1. Listing Files and Folders with PowerShell
The old dir command would list the files and folders contained within the specified directory within command prompt (cmd.exe). PowerShell has “Get-ChildItem“ cmdlet.
1. Open PowerShell on your Windows system. It’s better to run it as an administrator when you manage files and folders with PowerShell. Type “Get-ChildItem” to display the current directory files and folders.

The “ls” command will list your files also, so the topic focuses on PowerShell File management cmdlets. Basically the Get-ChildItem works like dir command.
That’s not all, you can do more with Get-ChildItem such as “Get-ChildItem -Recurse” command. It will show all folders, sub-folders and files inside the folders.
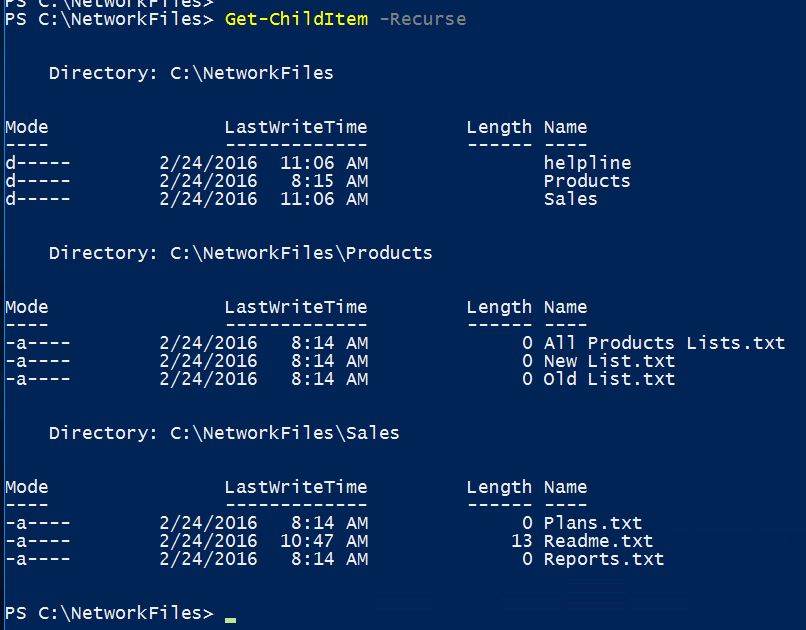
You might want a list of all the files and folders in the sub-folders. Just simply add the -recurse parameter at the end like an above command. Read more about Get-ChildItem. It’s pretty good for sysadmins to do manage files with PowerShell.
#2. Creating Folders with PowerShell
The New-Item cmdlet will create a file or folder in a directory. You can specify the directory rather than the current directory you are located.
1. To create a folder, simply type “New-Item” folder name. For instance, I have created a folder named helpline. The full command “New-Item helpline -ItemType directory“.
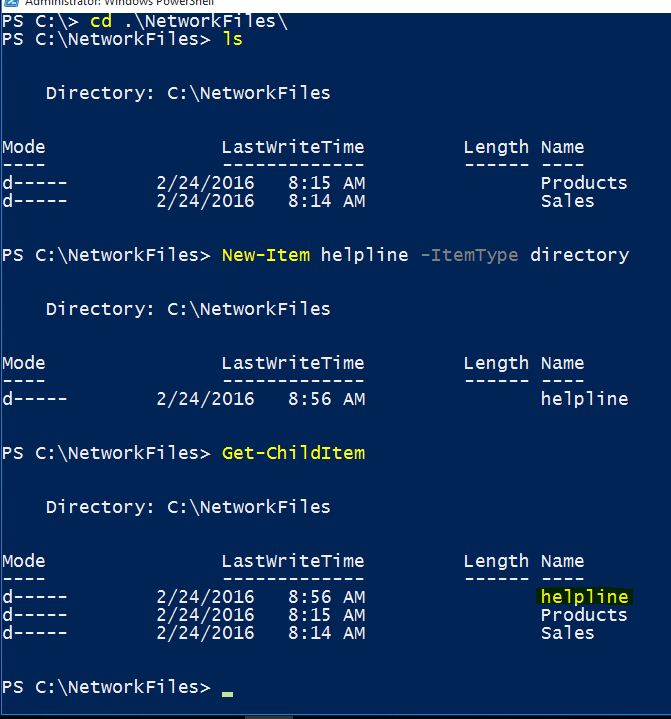
You must assign the item type in order to create a folder or and exact file type. The “-ItemType directory” is used for creating a folder with PowerShell.
#3. Create Files with PowerShell
Just like creating a folder, you can simply use -Type file” option to create a file. Do not forget to mention the file type or extension as well. Let’s create a text file on the helpline folder using PowerShell.
1. Type New-Item filename.extension. For example, to create a text file withing helpline folder. Type “NewItem c:\NetworkFiles\helpline\Helpme.txt -ItemType file“.

Yes, the file has been created successfully and you can check it with get-child item command. So good, let add some data or text to new file. The value parameter will help you add data to your files.
To add data to a text file, type “NewItem c:\NetworkFiles\helpline\Helpme.txt -ItemType file -Force -Value “Hello Jungle!”.
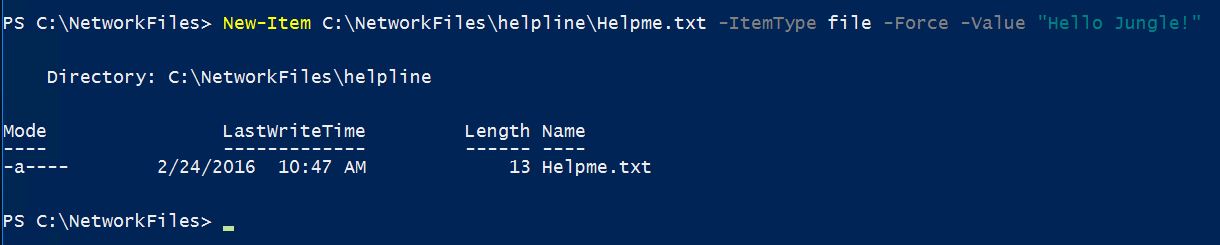
It will add the Hello Jungle word inside the helpme.txt file. The –Force parameter will replace the current file if it already exists.
#4. Rename Files with PowerShell
If type the files or folders wrong, the Rename-Item can be used to rename the files. Try to use and rename some files and folders.
1. Let’s rename a file, the Helpme.txt to Readme.txt. Type “Rename-Item c:\NetworkFiles\helpline\Helpme.txt Readme.txt” then press enter.

It will change the file without any prompt. So try to run the ls command to list the files inside the directory to see the changes.
#5. Move File and Folders with PowerShell
Related to manage files with PowerShell, like another command, moving files with PowerShell is also easy. The task will be accomplished with the Move-Item command.
1. Let’s move the Readme.txt folder from helpline folder to the Sales folder. Type “Move-Item c:\NetworkFiles\helpline\Readme.txt c:\NetworkFiles\Sales\” then press enter.

It will move the file without any prompt. So try to run the ls command again to see the files inside the Sales folder. The -Force parameter will overwrite the existing files.
#6. Delete Files and Folders with PowerShell
Deleting files and folder will be done with Remove-Item. It’s the main command to delete files or folder with PowerShell. Let’s delete the Readme.txt file and Helpline folder.
1. To delete the Readme.txt file, type “Remove-Item Readme.txt” and press enter. It will delete the file.

To delete a folder type “Remove-Item FolderName” and press enter. It will delete only the folder that doesn’t have any sub-folders. If you want to delete a folder with sub-folder or everything inside a folder, type “Remove-Item FolderName -Recurse” then press enter.

Yes, everything deleted successfully. The Remove-Item cmdlet also has many useful parameters that help you manage files with PowerShell better. Read more on Remove-Item.
#7. Verify the Existence of a File or Folder with PowerShell
Is my files or folder exist on the shared folder? Yep, this command will help you to verify the existence of files and folders with PowerShell.
1. To verify the existence of a folder, type “Test-Path c:\NetworkFiles\Sales” and press enter. Previously we have deleted the Sales folder and the result must be False.
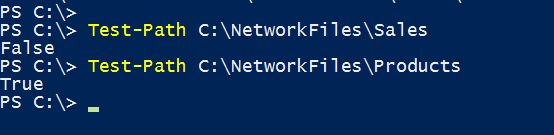
Yes, the Sales folder does not exist on NetworkFiles but the Products folder already exist. Let’s verify whether do we have any text files on the products folder. Type “Test-Path c:\NetworkFiles\Products\*.txt” and press enter.

Yes, the result is True, it means we have text files on Products folder. It will verify the Windows Registry keys as well. For instance “Test-Path HKCU:\Software\Microsoft\Windows\CurrentVersion” and press enter.
That’s are not all but enough for managing files and folders with PowerShell on Windows servers and Clients operating system.
Hope you have got something new about managing files and folders with PowerShell. If you have any questions, feel free to ask and comment us your helpful suggestions and feedback.