You can set up a local network with central authentication and join that network to use the shared resources. If you want to join your windows 11 client computer to an active directory domain, and don’t know where to start, you are in the right place. In these tutorials, you learn how to join the computer running Windows 11 operating system to a domain from PowerShell and computer settings.
Related: How to Set Static IP Address on Windows 11
Important notes before joining your computer to a domain!
- Ensure the network connectivity
- Set a unique name for your client’s computer
- Make sure to have e DNS connection
- Log in as an administrator account
- Know the domain name you want to join
Join Windows 11 computer to a domain from computer settings
This is a common graphical method to join your computer to the domain environment. To do that, follow the steps below:
- First of all, open the system properties: press Windows+R to open the Run and write sysdm. Cpl then clicks ok.
- Click on the ‘change’ button in the system properties dialogue box.
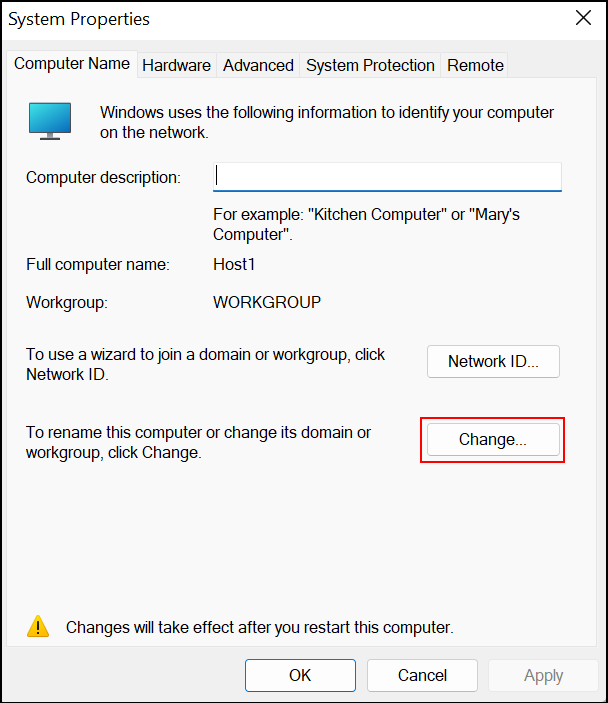
- Select the radio button before the domain name and input the domain name in the text box; click ok.
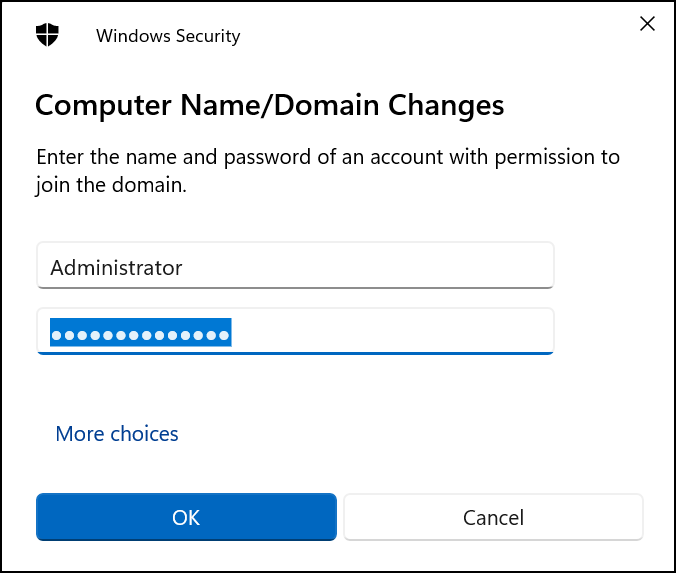
- A security window pops up asking for the username and password of the domain you want to join. Write them and enter.
- A tiny window welcomes you to the domain; click Ok.
- A window will prompt you to restart the computer. After the restart, your computer is a member of the network.
How to join your computer to the domain using PowerShell?
Another easy way to join the Active Directory Domain is through PowerShell. You can add your computer to a network using PowerShell with the below steps:
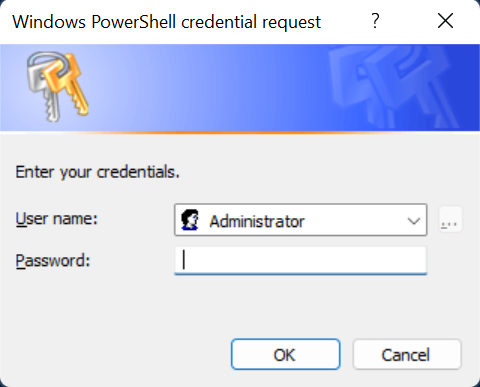
- Search the Windows PowerShell in the search box and run it as administrator.
- Write the
Add-Computer –DomainName “Domain-Name” –Credential “Domain-UserName”in the PowerShell window and enter.
- A tiny window shows up asking to enter the Domain-Password. Enter the password and enter.
- Restart your computer, and then you are a member of the network.
How to check if your PC is joined to a domain or Workgroup?
There are multiple ways to check whether your computer is a domain member or a WORKGROUP. The most accessible and most convenient of them is through Command Prompt:
- Open the Command Prompt from the Start Menu.
- Write the
Systeminfo |findstr /I “domain”and enter. In the second line, you will see either the domain is a workgroup or a member of a domain.
Another way to check if your computer is joined to a domain is through the system properties:
- Go to the setting of your computer. Click on the System, scroll down, find the About option, and click on it.
- Click on the hyperlink “Domain or Workgroup.”
- In the system properties dialogue box, click on the change button.
- If the workgroup radio button was selected, you are not a member of any domain. Else, if the domain radio button is selected, you are a member of the domain.
Conclusions
There are multiple ways to add your computer to a domain. And the easiest and most convenient of them is through PowerShell and computer settings that we talked about. Write your questions in the comment section of this page.