Hyper-v Beginner: A Practical Guide to Virtualization
Hyper-V Installation and Configuration Step by Step in Windows Server 2016/19 and Windows 10
The Hyper-V beginner is a practical guide to a virtualization environment with Hyper-v in Windows client and Windows Server. The Hyper-v role enables you to create and manage a virtualized computing environment by using virtualization technology (VT) that is built into Windows Server 2008 to 2022 and Windows 8 to Windows 11. In this article, we are Installing Hyper-v in Windows client and Server. But the installation is the same on all Windows clients and servers that support Hyper-v as virtualization software.
The Management Tools for the Hyper-V Role consists of:
- GUI-based management tools: Hyper-V Manager, a Microsoft Management Console (MMC) snap-in, and Virtual Machine Connection, which provides access to the video output of a virtual machine so you can interact with the virtual machine.
- Hyper-V-specific cmdlets for Windows PowerShell. Windows Server 2012 includes a Hyper-V module, which provides command-line access to all the functionality available in the GUI, as well as functionality not available through the GUI. For more information about the Hyper-V module, see the Hyper-V Module for Windows PowerShell.
Hardware requirements:
- Hyper-V requires a 64-bit processor that includes the following
- Hardware-assisted virtualization. This is available in processors that include a virtualization option—specifical processors with Intel Virtualization Technology (Intel VT) or AMD Virtualization (AMD-V) technology.
- Hardware-enforced Data Execution Prevention (DEP) must be available and enabled. Specifically, you must enable Intel XD bit (execute disable bit) or AMD NX bit (no execute bit).
Practical Guide to Virtualization: Installing Hyper-v
The installation of Hyper-v is easy, you can do the installation with PowerShell command line and graphical wizard also. But before installing Hyper-v on Windows 8.1 or Windows 10, you must enable VT technology from your system BIOS.
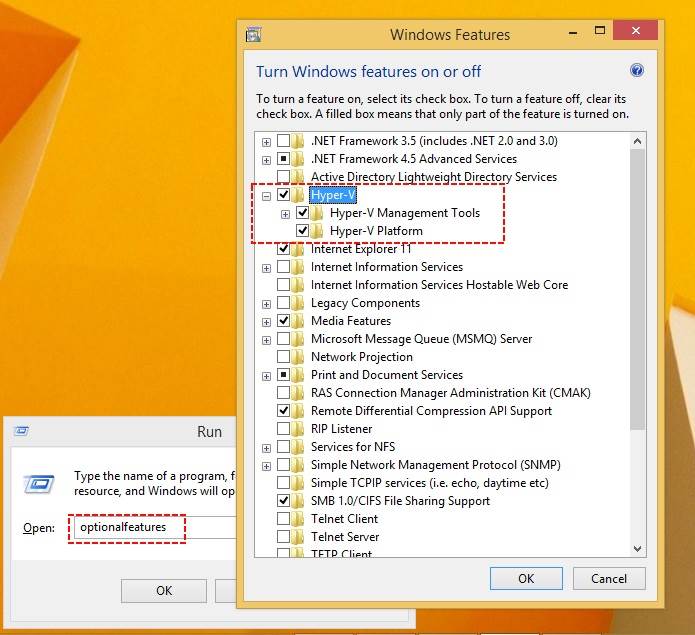
- On Windows 8.1 or 10 press “Windows+R” to open the ‘Run” and type “Optionalfeatures” then press enter. This will open the Windows Features wizard.

2. Now, on the opened Windows features page select “Hyper-v” and two sub-features “Hyper-v Management Tools, Hyper-v Platform and click OK. When the installation has finished successfully, reboot the system.

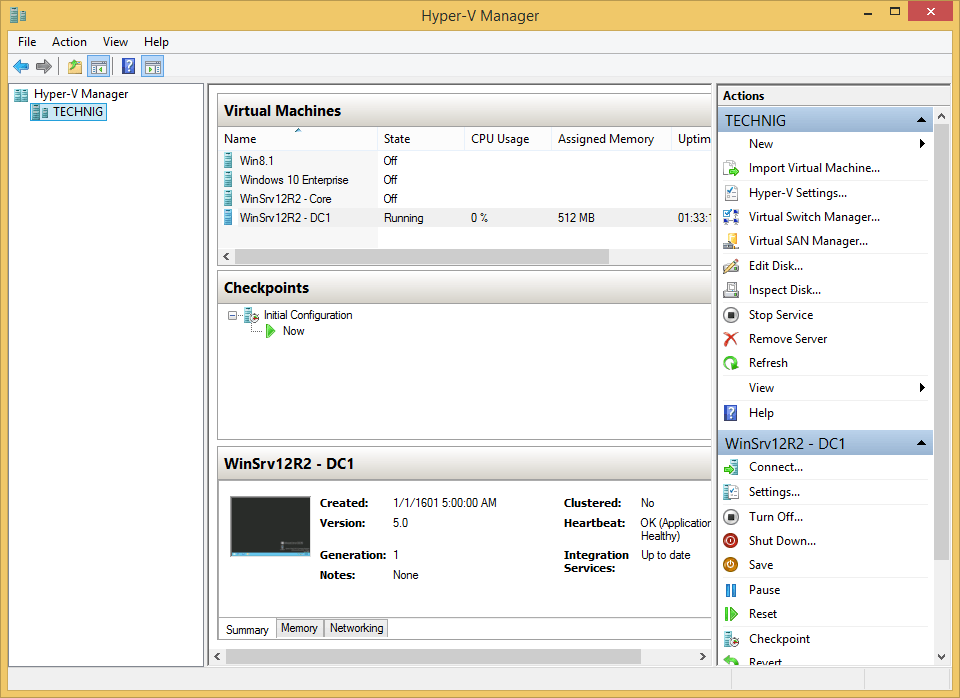
Here is the Hyper-v on Windows 8.1.
2. Install Hyper-v on Windows Server 2012 R2
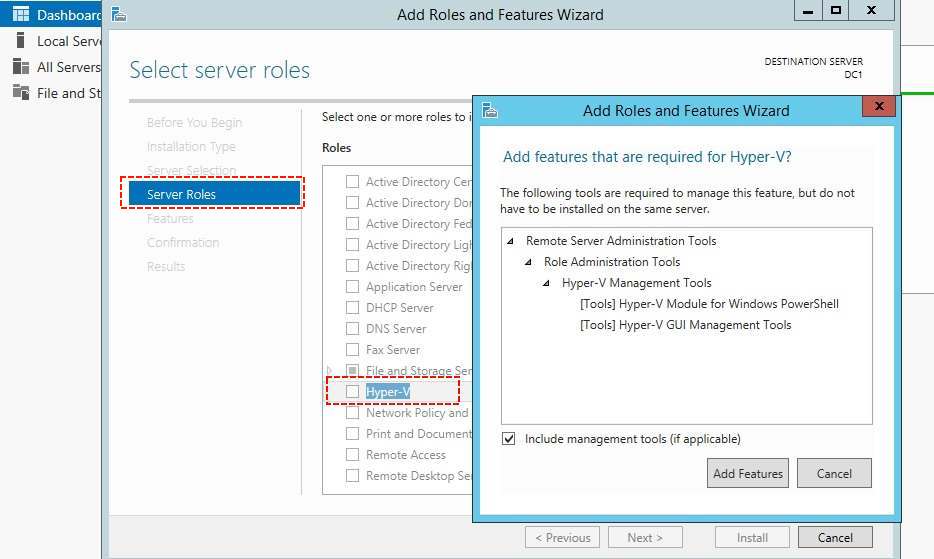
Installing Hyper-v on Windows Server 2012 R2 will do from Server Manager. From the Server Manager dashboard, click Manage > Add Role and Features then directly Server Roles.

Do nothing only click next to finish the installation. After installation once reboot the system.
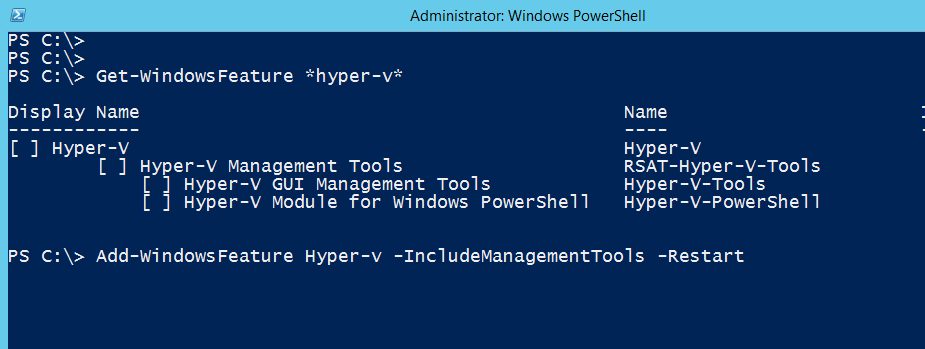
You can install Hyper-v with PowerShell command on Windows Server with the “Add-WindowsFeature” command.
Add-WindowsFeature Hyper-V -IncludeManagementTools -Restart

Done successfully the Hyper-v beginner a practical guide to virtualization.
In the next Virtualization article, we will configure the essential options of Hyper-v for a network Lab.
Related to the hyper-v deployment guide
How to install hyper-v Server 2016
Install Hyper-v Windows 10
Hyper-v installation and configuration step by step
Hyper-v installation and configuration step by step 2012 R2
Hyper-v installation and configuration step by step 2016
Hyper-v installation and configuration step by step 2019
