In this great spring text effect tutorial we will show you how to create spring text effects using Photoshop, so we will start off by creating our own custom brush and play with brushes panel, colors, texture and many more tricks to achieve the best result.
Creating Spring Text Effect in Photoshop
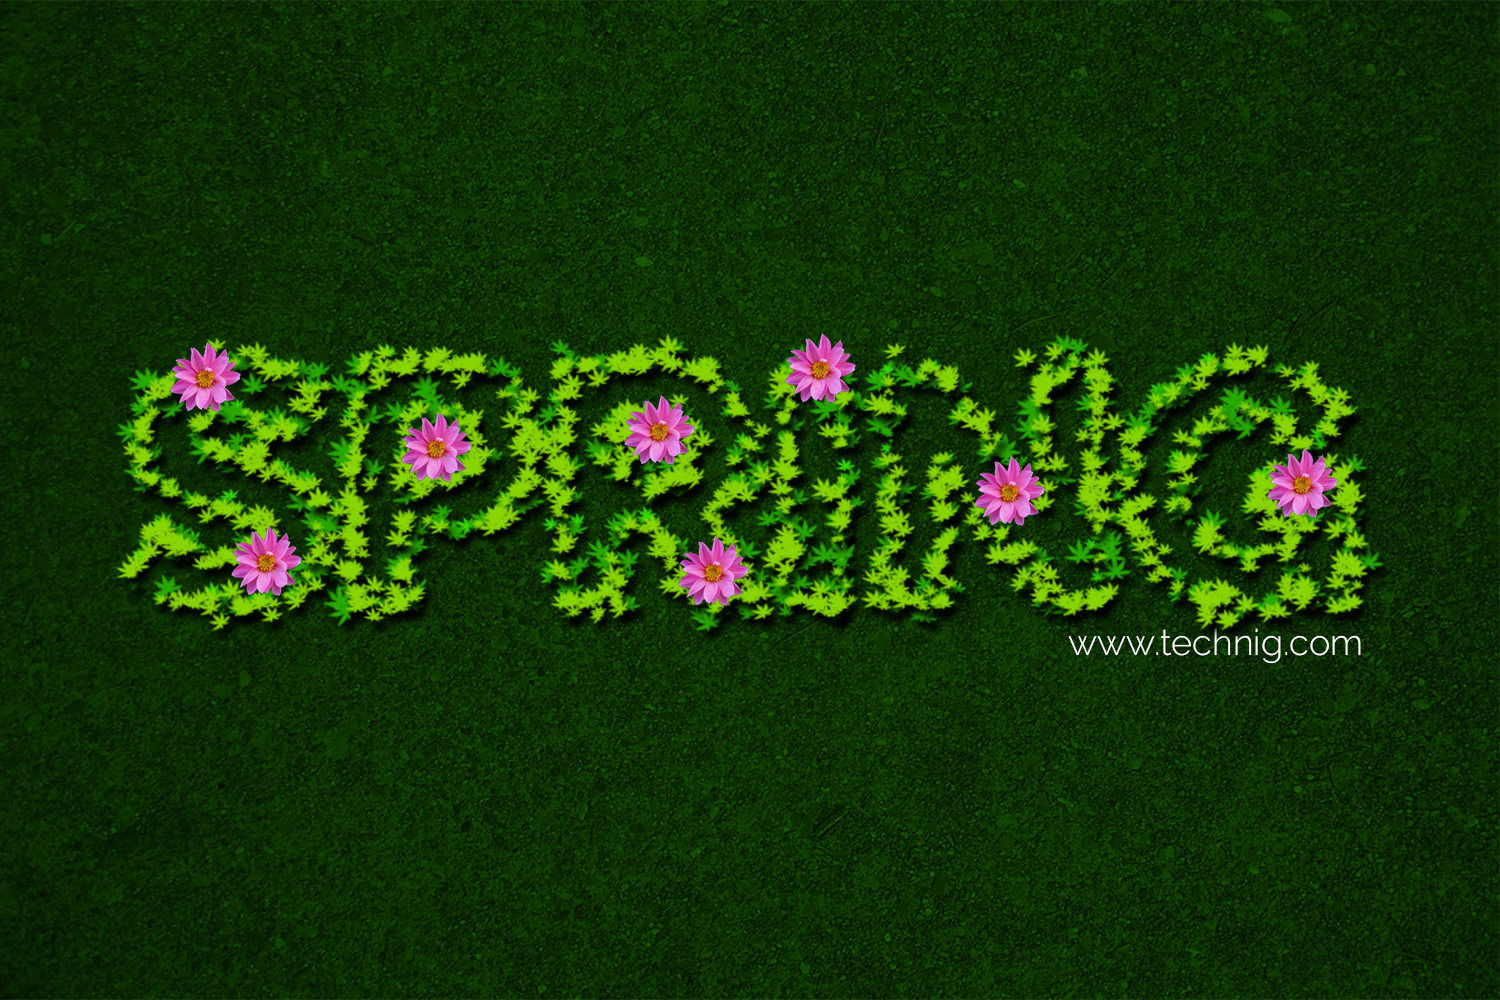
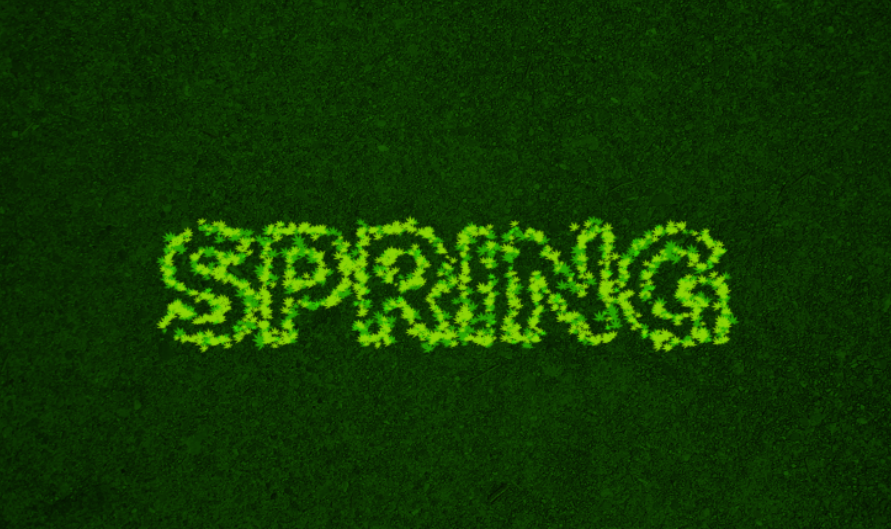
Lets see what we are going to create.
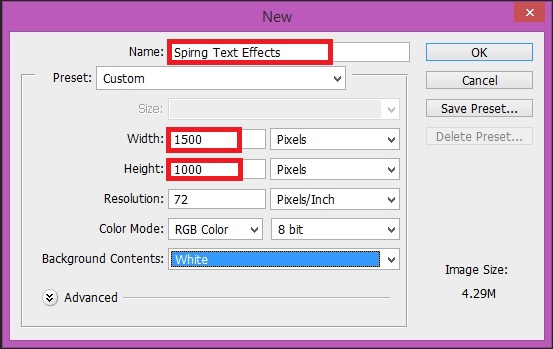
Step 1: Create a new document Go to File> New with 1500×1000 px size anew black document will open.
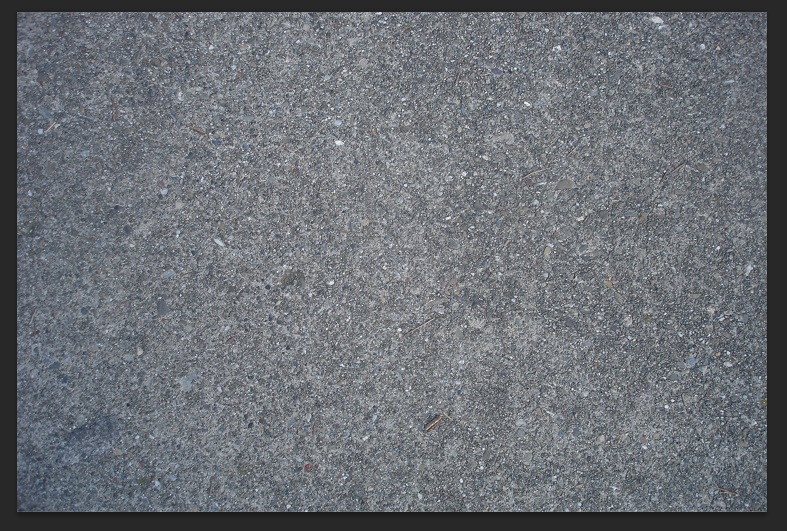
Step 2: place a cement texture to your document download (https://www.technig.com/wp-content/uploads/2016/04/texture-1.jpg)
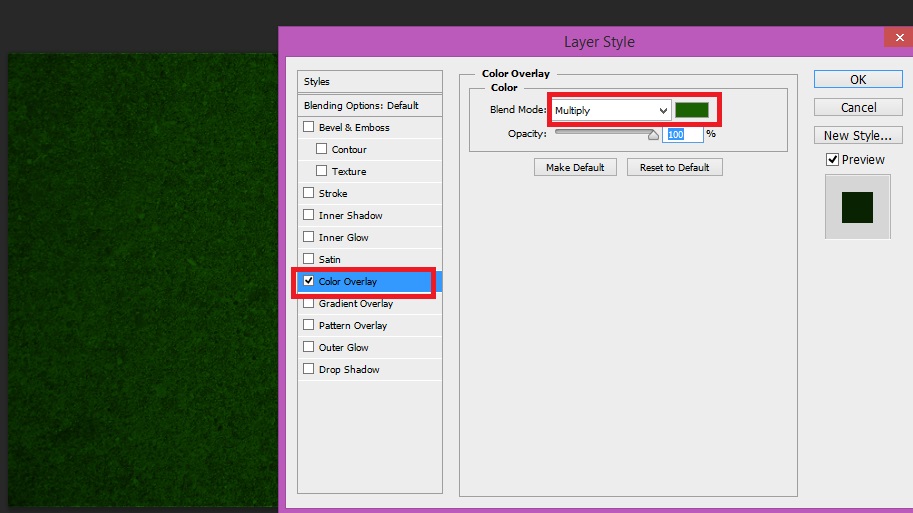
Step 3: Apply color overlay effects to your texture use this code for color(1b6202) Blend Mode Multiply.
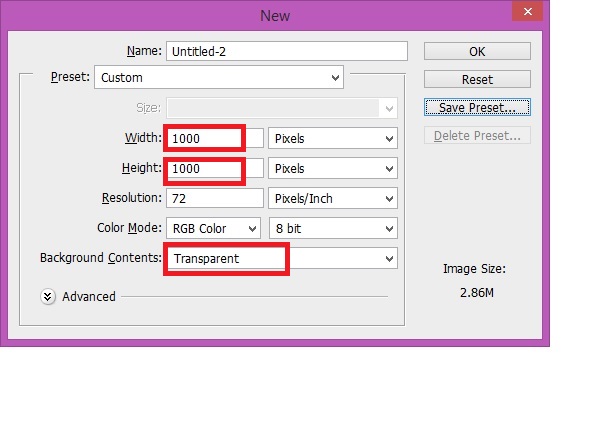
Step 4: Now Create a new document, Width 1000 px and Heigth 1000 px background Content Transparent.
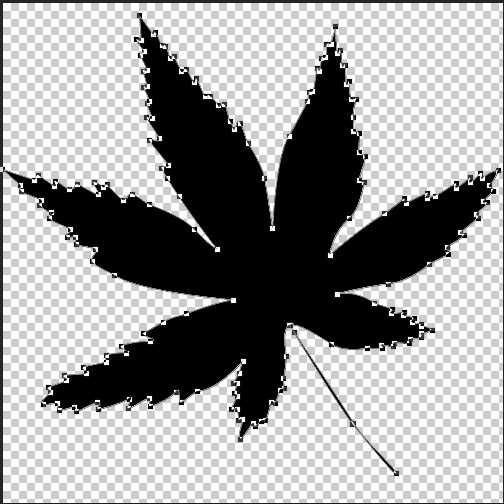
Step 5: Now pick the Custom Shape Tool and select a leave shape from the Option bare and draw it at the middle of the document, with black color like bellow than go to Edit> Define Brush Presents. actually it save the shape as a brush that you use it any time.
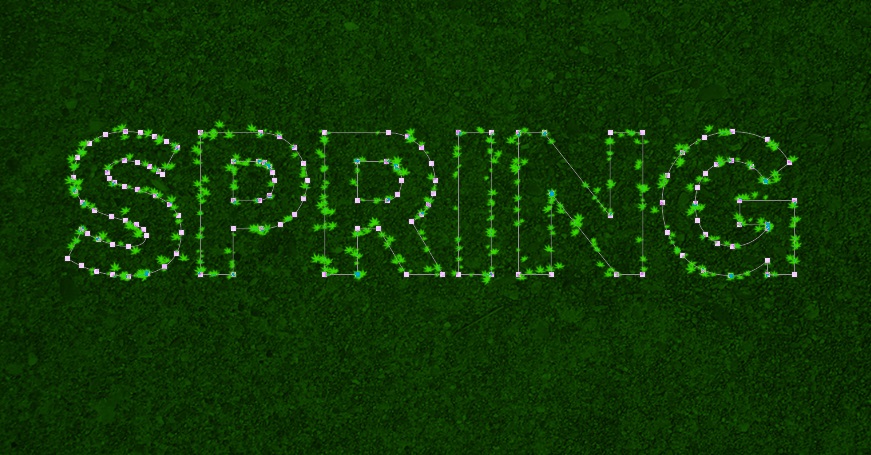
Step 6: Now pick the Pen Tool and type a spring and use a bold font we use Raleway Extra bold, it is a free font you can download it from google.

Step 7: So select your Spring text and go to Text Menu> Create Work Path it will create a path from your text.

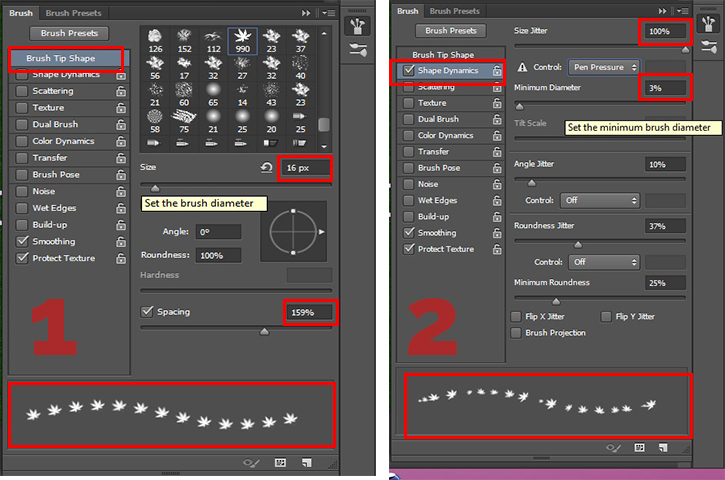
Step 8: Now pick the Brush tool from Brush preset select the leave brush we created in step 5 then open the brush Panel go to Window menu> Brush and follow the instruction bellow.
Step 9: Now create new layer by pressing Ctrl+J and press A to pick the Path Selection Tool than select the text path and right click on the path a long list will open, from list select Stroke Path a dialog box will open for you from tool use Brush, click OK the result should look like image bellow, use the code for color (83c903) and (218d00) for different layers.
Step 10: Do the same process over three layers, each time change the size and spacing of your brush from brush panel, so your result on three layer should look like mine.
Step 11: Now apply drop shadow FX for three brushed layers and bring some flower place it at the middle of the text as bellow.
Thanks for following, if you have any question feel free to ask.