As part of a DNS server configuration, it is also possible to create and configure an internal root DNS zone for an environment. When we create it manually, the DNS forwarders and DNS Root Hints that resolve external DNS queries automatically get disabled. That is how we can stop external name resolutions by using an internal root zone. Once we have created a root zone, it acts as a parent zone for all the root zones. Having said this overview, this article covers how to create and configure a Root DNS Zone in a step-by-step approach. We use Windows Server 2022 for this configuration. However, the instruction also applies to other versions of Windows Server OSes.
Other DNS articles:
- How to Install DNS Service Using PowerShell and Server Manager?
- Configure DNS Forwarder and DNS Conditional Forwarder.
- Detailed Instruction to Create and Configure DNS Zones.
Steps to Create and Configure a Root DNS Zone
With the above brief overview in mind, let’s get our hands dirty and go through the steps to create and configure a root DNS zone in Windows Server 2022.
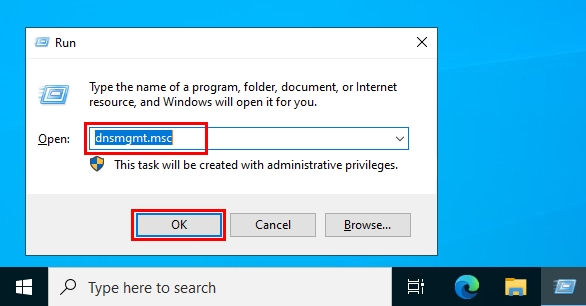
1. Press down the Windows key + R keys on your keyboard to open the Run dialogue box.
2. Type indnsmgmt.msc command and press enter.
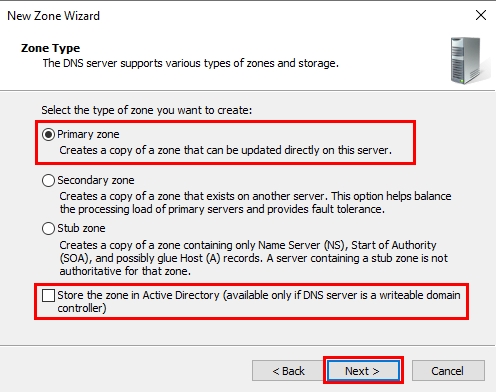
3. Expand the server name on the DNS Manager console. Then, right-click on the Forward Lookup Zone and select the New Zone option. Click Next on the Welcome Wizard afterward.
4. On the Zone Type section, select the zone type for your new zone and click Next. In our example, we chose the Primary zone for which we check the first option and uncheck the last option.
5. Put only a dot (.) in the Zone name box and click Next to continue.
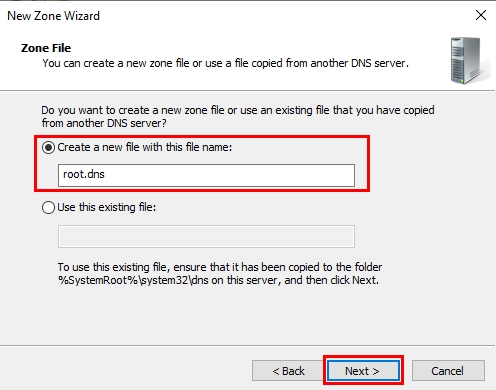
6. On the Zone File section, specify a name for the zone file or leave it as its default. Then, click on the Next button.
7. Select the appropriate Dynamic Update option for your root DNS zone and click on Next. On the next page, click on the Finish button.
That is it! Following the above seven steps, we can create a root DNS zone in Windows Server 2022. Now, you can see the new zone with “.(root)” name is added to the zone list.
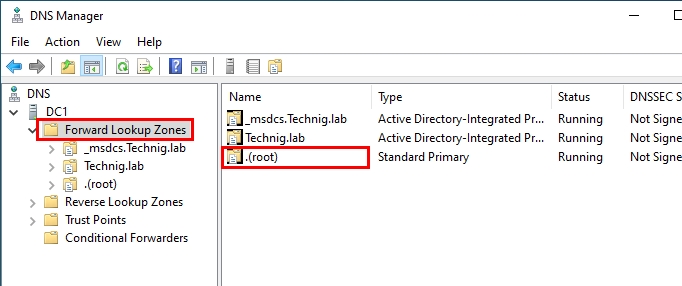
As we have added the root zone, the root hints and forwarders are all gone if you check them. So, this way, the root DNS zone stops all external name resolutions.
Summary
To summarize what we discussed in this article, we first covered a brief overview of the Root DNS zone. We discussed its function and use. Then, we went through step-by-step instructions and practically created and configured a Root DNS zone in Windows Server 2022.
In the end, I hope this article can provide you with the exact answer to your question. Make sure to share your thoughts and further queries in the comment section.