Creating and configuring a DHCP Scope is a primary configuration of a DHCP server. A DHCP scope is a range of IP addresses we define for the clients in a subnet. A DHCP server manages this scope. It assigns a specific IP address from this scope to each client in the subnet upon their request for an IP address. That is the primary goal for creating a DHCP scope, besides other network settings it includes. This article walks you through the steps to create and configure a DHCP scope using the graphical user interface (GUI) in Windows Server 2022.
You may also like to read: Install And Configure DHCP In Windows Server 2022 Using Server Manager
Steps to Create and Configure a DHCP Scope
It is easy enough to create and configure a DHCP scope using the GUI method on Windows Server 2022.
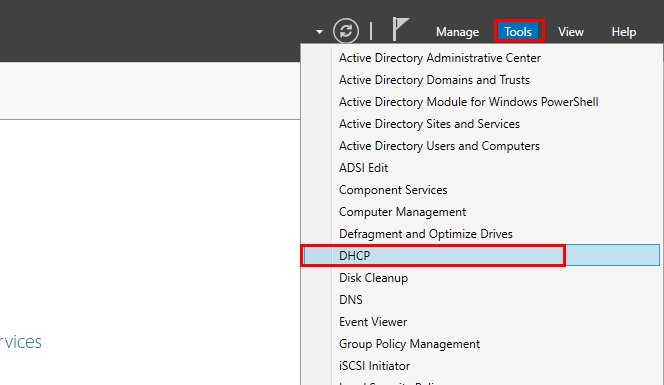
- Open the Server Manager console. Then, go to the Tools menu on the Server Manager and click on DHCP.
- Expand your DHCP server and right-click on IPv4. Select New Scope from the options and click on Next on the Welcome window.
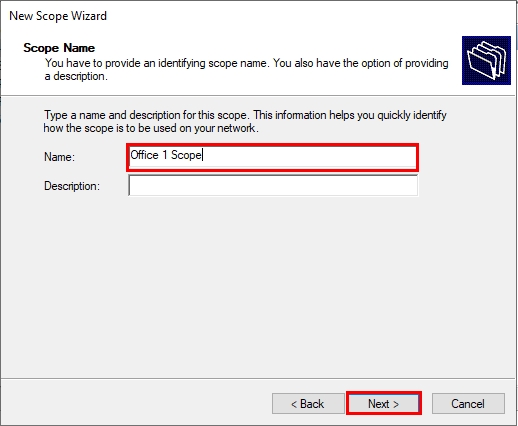
- Put a name and the description for your new DHCP scope, then click on Next.
- Specify the range of IP addresses for your DHCP pool using the Start IP address and End IP address boxes. Then, configure the subnet mask and click on Next.
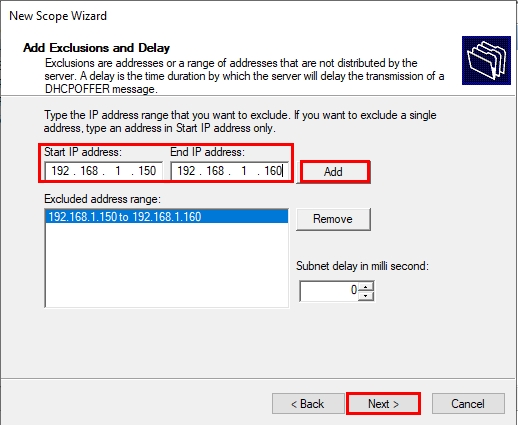
- Add the exclusion range using the Start and End IP address boxes and the Add button. Click on the Next when you set it.
- Define the Lease duration or leave it as default and click on Next afterwards.
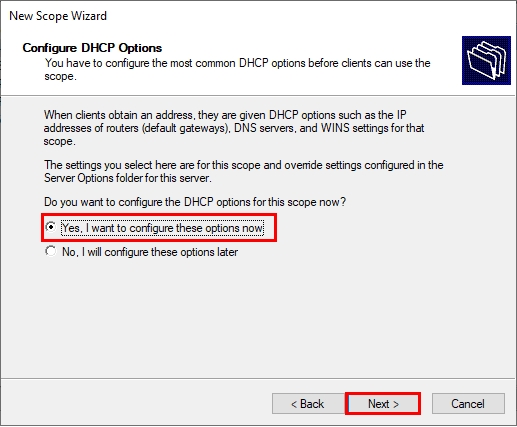
- Check out the first option on the next screen to further configure your DHCP scope, and click on Next.
- Add the Default Gateway address of your network if you have, and click on Next.
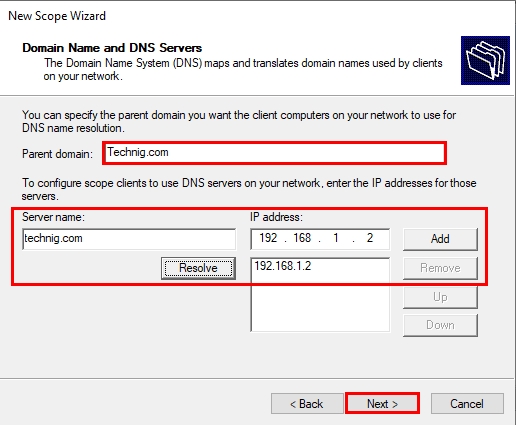
- Specify the Domain Name and add the DNS Server(s) on the next screen. Click on Next to continue.
- Add the WINS Server(s) address if you use it. However, we no longer use WINS Server.
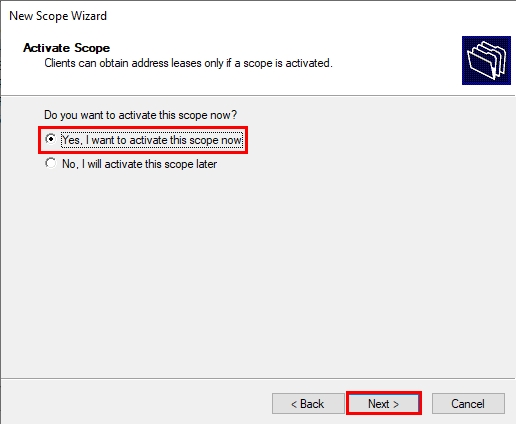
- The last step is to activate the scope. Check the first option to activate, and click on Next. Click on Finish on the next page.
The above steps are all that we need to go with to create and configure a new DHCP scope on Server 2022.
Conclusion
DHCP Scope configuration is, by far, the setting we should go with right after installing and configuring the DHCP role on our DHCP Server. As described in a step-by-step approach, we primarily define the range of IP addresses from which a DHCP server should assign to each client in a subnet. Additionally, we also specify the exclusion range and some other settings, including Default Gateway, DNS server, and scope activation.
I hope you found this article informative and helpful. You may share us your queries and thoughts in the comment section.