In this tutorial I am going to show you how to turn photo into sketch In Photoshop? It is very sample to turn photo into sketch in Photoshop, follow the steps bellow to understand how to turn photo into sketch In Photoshop? If you understand this article very well, you will be able to create an sketch action as well.
Turn Photo Into Sketch In Photoshop
The first thing you need is a photo which has been taken in studio with a good detail and white background.
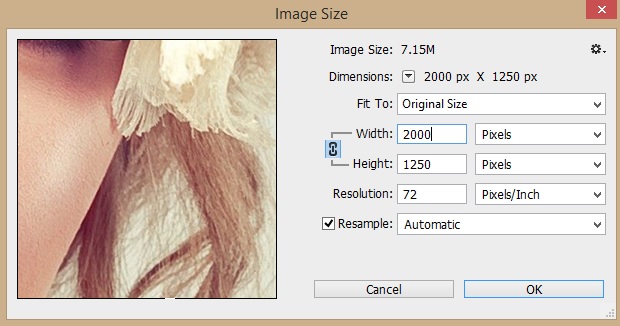
1. Open your photo in Photoshop go to File> Open (Ctrl+O) select your photo and click open, the pixel dimension of the photo which I am going to use is (2000×1250 px).
2. Now duplicate your photo name it Black & White, and change it to black and white go to Image> Adjustment> Black & White or use keyboard shortcut (Alt+Shift+Ctrl+B).
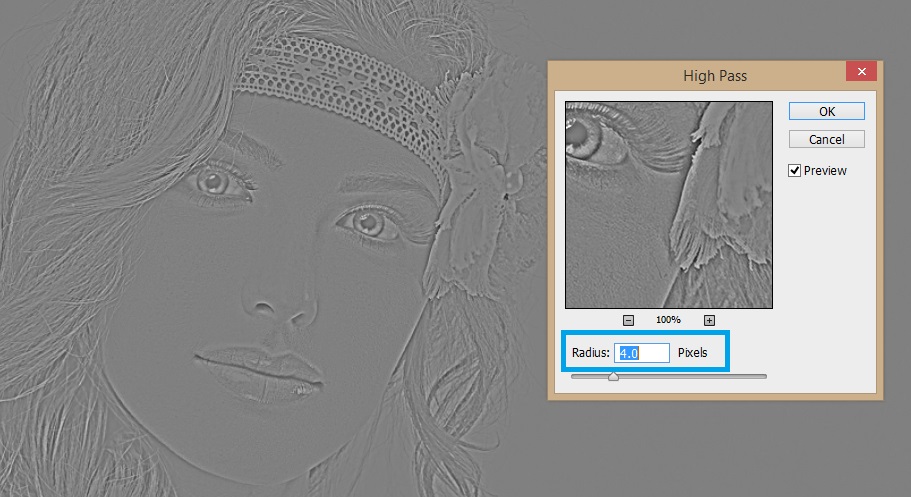
3. Right! Now make a copy of Black & White layer and then go to Filter> Other> High Pass, Radius (4 px), we do it to sharp our photo, to add more details to it, after applying High Pass change the blending mode of your layer to Linear Light.
4. OK, now copy the main Background layer, not Black & White layer then move it to top of all other layers and go to Filter> Filter Gallery > Artistic > Rough Pastel. Set all the value as bellow, you can play whit values to get better result.
5. Now change the blending mode of your layer to Multiply and see the result it looks like pastel color painting, its great! But to turn it into pencil sketch just add a Black & White Aadjustment.
Thank you very much for following, if you have any question about this tutorial feel free to ask it in comment section.
Short article but it’s useful…