Windows 10 task scheduler features is a tasks automation system that helps you create and run tasks some tasks. These tasks can be scheduled to an exact date, day or hours. You can use Task Scheduler to create and manage common tasks that your computer will carry out automatically at the times you specify. To use Windows 10 tasks scheduler like an expert, follow the articles.
Windows 10 Task Scheduler
A clear description of the task scheduler for the wiki. The Task Scheduler is a component of Microsoft Windows that provides the ability to schedule the launch of programs or scripts at pre-defined times or after specified time intervals: job scheduling (task scheduling). It’s good to learn how to professionally use Windows 10 task scheduler for different tasks.
- Launch it via the Windows search. Click the search bar/icon on the taskbar.
- Run it via the Run dialog window. Press the Win + R then type “taskschd.msc“.
- Use the All Apps list in the Start menu. The Start menu contains a list of all software installed on your PC.
- Start it from Control Panel.
- Use Command Prompt.
The fast way to open task scheduler is using Windows Run. Let’s create a task scheduler in Windows 10. The task scheduler can be opened from different locations, control panel, settings, and system management. The best option is using Windows Run with a shortcut key.
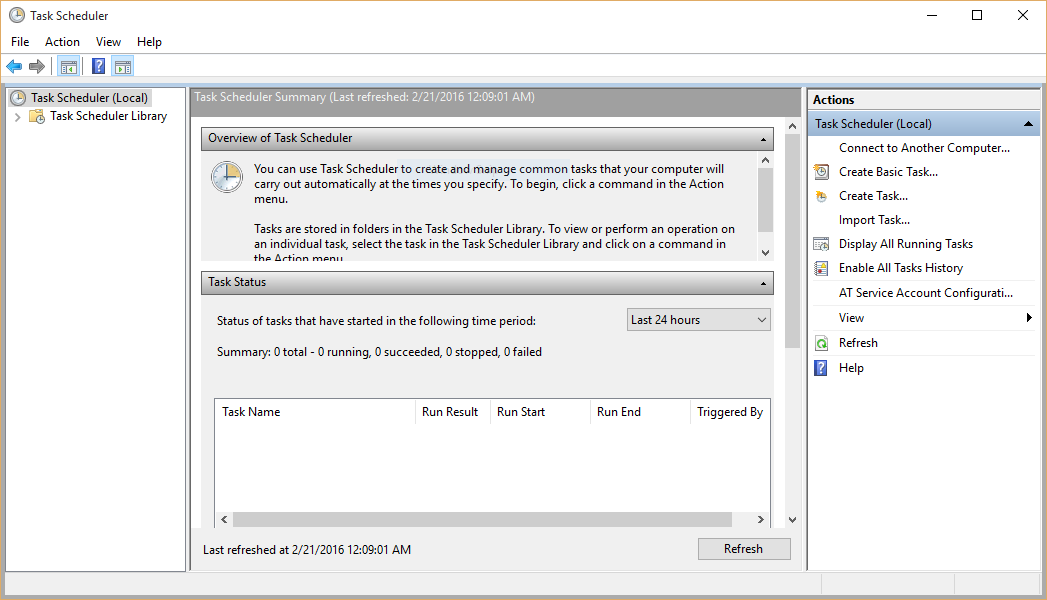
1. Type “taskschd.msc” on the Run and press enter to open the Task Scheduler.
It is the main page of the Windows task scheduler. You can simply create a new task or manage predefined tasks. So let’s create a new task to open a program at login time.
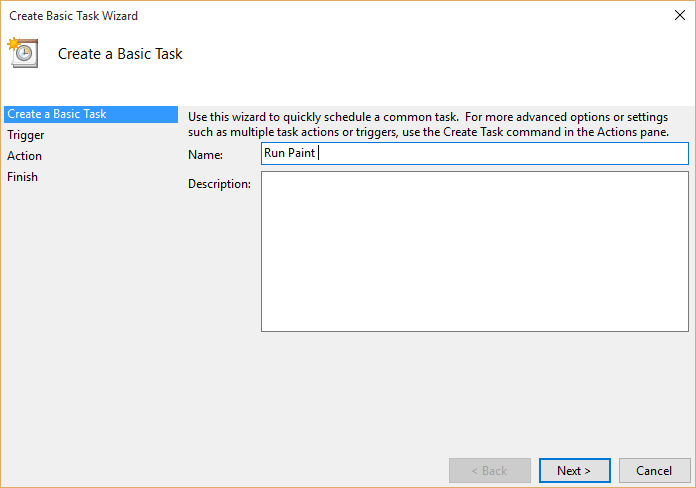
2. From the right side of the Task Scheduler window, click Create Basic task. Type the name of the task you want to create and define a clear description then click Next.
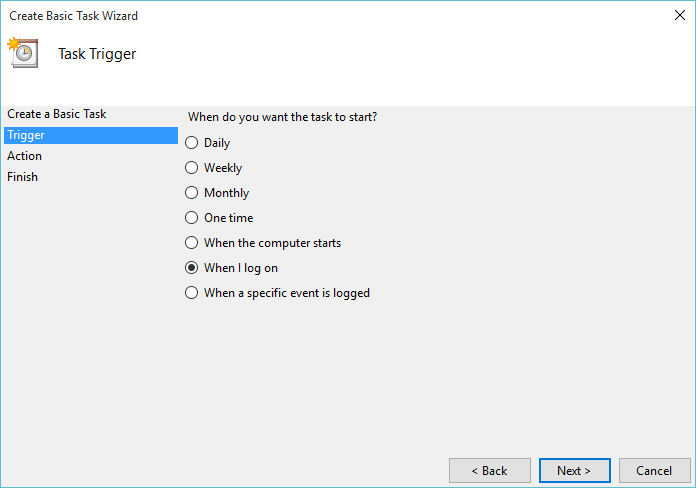
3. Select the exact time, when you want the task start. So select When I log on. It will open the program when a user logs on to the system.
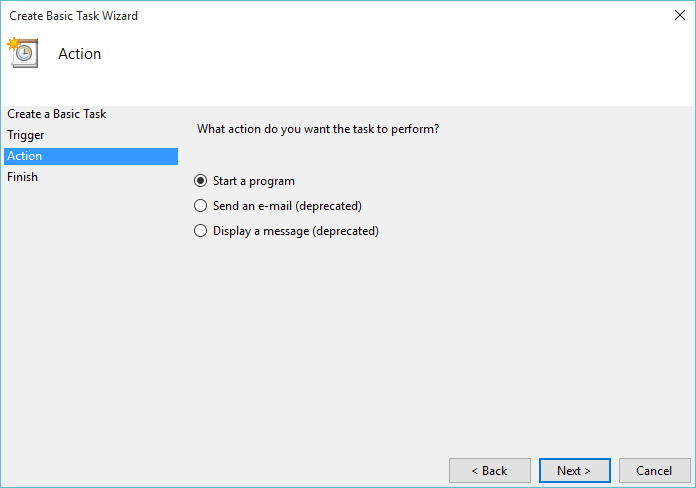
4. You can select one of these three options. Start a program, Send an e-mail, or Display a message. I want to run a program, so I need to select Start a program.
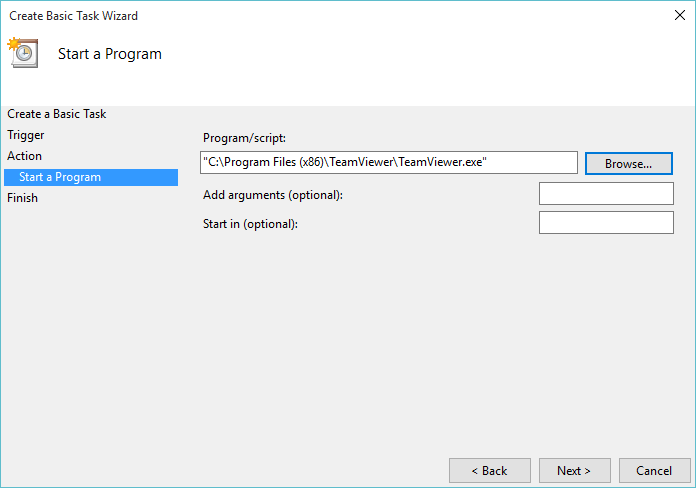
5. Click Browse and choose the program you want to run at logon time. You can select any program that is installed on your computer and clicks Next.
Note: Some program has the feature that let the program be running when user wants to log on. So it’s not required to create a task scheduler. Just enable the feature. You can find some of them on the Startup tab of Task Manager.
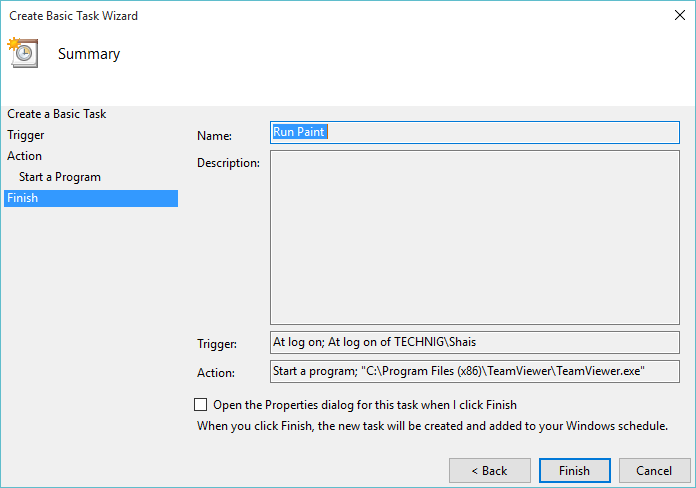
6. Finally, click Finish to create the task. The task has been created and you can manage and edit it always.
7. Navigate to the Task Scheduler Library to see the created task and some predefined tasks.
Now this task will be open the Team Viewer when I have logged on. To test the task whether it’s work or not, just right-click the task and run it. It must open the program you have selected to run at startup.
Try to create and manage more task and work with all feature and options of Task Scheduler in Windows 10. More practice will get you expert on using professionally Task Scheduler in your daily activity on the network.
Related Queries:
How to create a task in windows 10
Task scheduler Windows 10 not working
Task scheduler Windows 10 shutdown
Task scheduler windows 10 command line
Task scheduler windows 7
Windows 10 task scheduler disable
Task scheduler windows 10 errors
Windows 10 task scheduler batch file
Task scheduler command line examples
Task scheduler command line arguments
How to open task scheduler Windows 10
Run scheduled task from the command line
Schtasks command line
Windows task scheduler
How to open task scheduler in Windows server 2003
Task scheduler windows 2003