In Photoshop, brushes are under-utilized tools that can be efficient and effective when the right diameter is chosen. We use and need brushes all the time, creating brushes make it easy to draw or paint a shape in different sizes, opacity, angle and even different colour. You can make brushes from shapes or images, so when you create your custom brushes you can save a theme in your hard drive and use it other time or share it with your friends. Now I am going to show you how to make a brush inside Adobe Photoshop and how to customize it.
Make Custom Brush in Photoshop
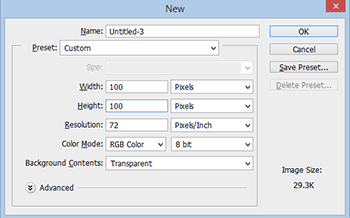
Step 1: Open a new document by the dimension of (100×100), no matter if you create a smaller or bigger document it will be the default size of your brush. remember that your Background Contents should be Transparent.
Step 2: Draw a shape, I draw a shape from custom shape tool you can draw whatever you like.
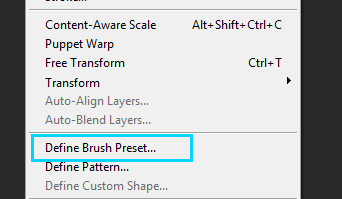
Step 3: Now go to Edit menu, select Define Brush Preset, in here you define and save your brush in brush preset panel.
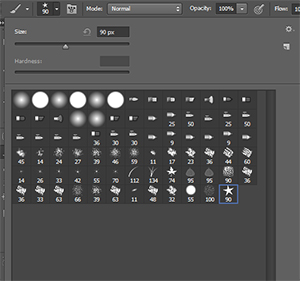
Step 4: Select the brush tool and open brush preset piker, your brush saved at the end of the preset piker, select it by clicking on it.
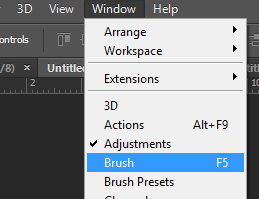
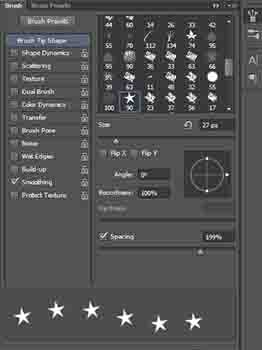
Step 5: It is time to customize your brush from brush panel, the Brushes Panel is the right place to create, edit, save and load a particular brush behaviour or Brush Preset. You can customize several things here like the brush tip shape, scattering, opacity jitter, flow jitter, Background/Foreground jitter, configure controls for each variation and more. to open the brush panel go to Window> Brush or press (F5) key.
Step 6: Now I just work with some of the property not all, first customize the Brush Tip Shape, Do not try to copy the exact setting what I do play with each property for the experiment.
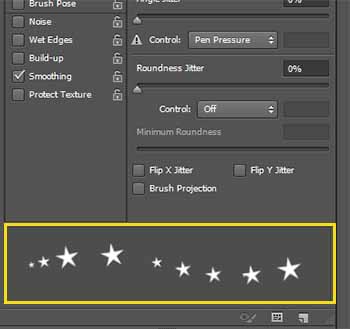
Step 7: Go to Shape Dynamic property and increase the Size Jitter to 100, by increasing the size jitter your brush paint in different sizes. you brush looks like below.
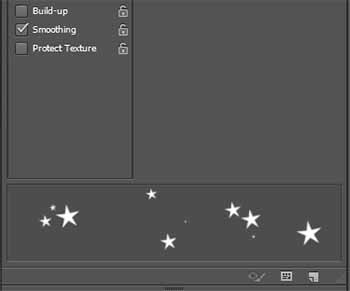
Step 8: Finally go Scattering property and increase the Scatter option up to 1000, it scattered the brushes at any angle, you can also increase the count option to paint more.
I add some effects on it, and if you have any question leave your comment below I become happy if I answer your question, hope you enjoy it thanks.
Khobish sir…..Like