This article “configure DHCP failover on Windows Server” is apply-able on Windows server 2012 and higher for DHCP High Availability. The DHCP server failover feature provides the ability to have two DHCP servers provide IP addresses and option configuration to the same subnet or scope, providing for continuous availability of DHCP service to clients. The two DHCP servers replicate lease information between them, allowing one server to assume responsibility for servicing of clients for the entire subnet when the other server is unavailable. It is also possible to configure failover in a load-balancing configuration with client requests distributed between the two servers in a failover relationship.
The DHCP failover in Windows Server enables administrators to deploy a highly resilient DHCP service to support a large enterprise without the challenges of the options discussed earlier. The main goals of the feature are the following:
- Provide DHCP service availability at all times on the enterprise network.
- If a DHCP server is no longer reachable, the DHCP client is able to extend the lease on its current IP address by contacting another DHCP server on the enterprise network.
Read the Understand and Deploy DHCP Failover article on Microsoft technet.
Configure DHCP Failover on Windows Server?
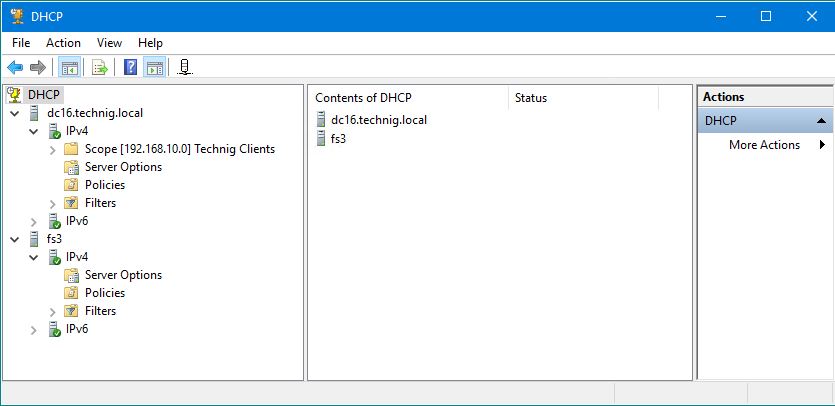
You need to have two DHCP servers to configure DHCP failover on Windows Server. Install DHCP on both servers and don’t create scope on the second one. Just create a scope on the primary DHCP server.
- On Windows server type “dhcpmgmt.msc” on Run and press enter to open DHCP Manager.
- On the DHCP console right click the DHCP and click Add Server. Select the second DHCP server and add it to current DHCP console.
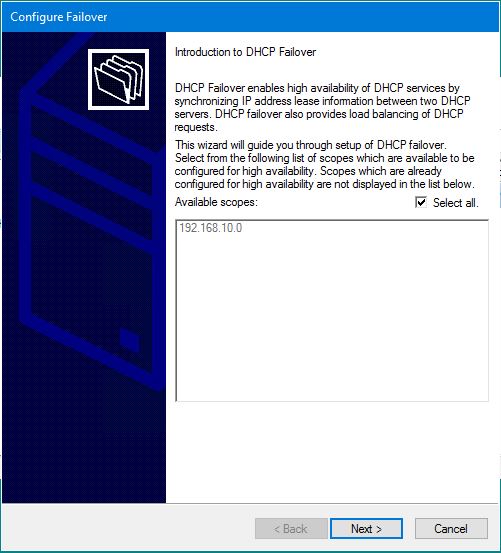
3. To configure DHCP Failover on Windows Server, right click on IPv4 of primary DHCP and select Configure Failover. On the welcome page of Configure Failover select Select all and click Next.
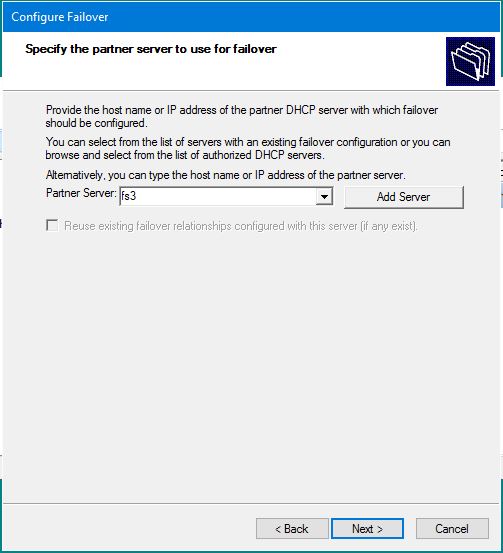
4. Add the second DHCP server and click Next.
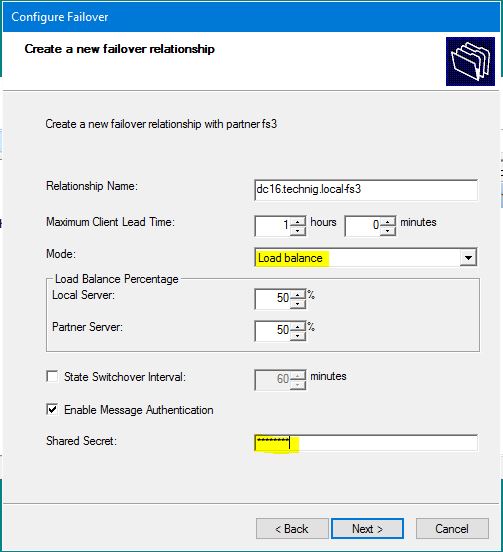
5. On the Create a new failover relationship page, select Load balance mode and type a password then click Next.
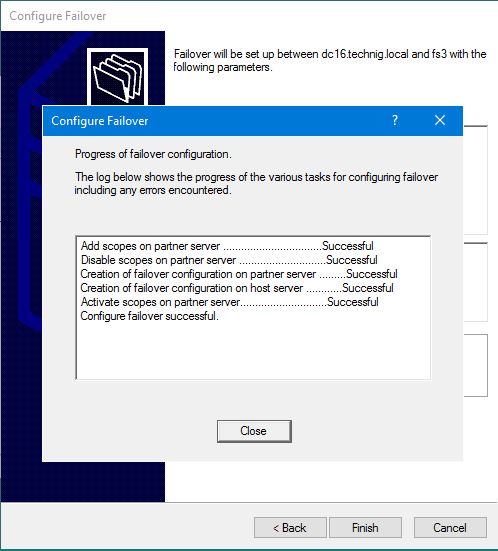
6. Finally click Finish to set up failover between two servers. Make sure the process should be finished successfully. Close the page and to to see the changes on DHCP management console.
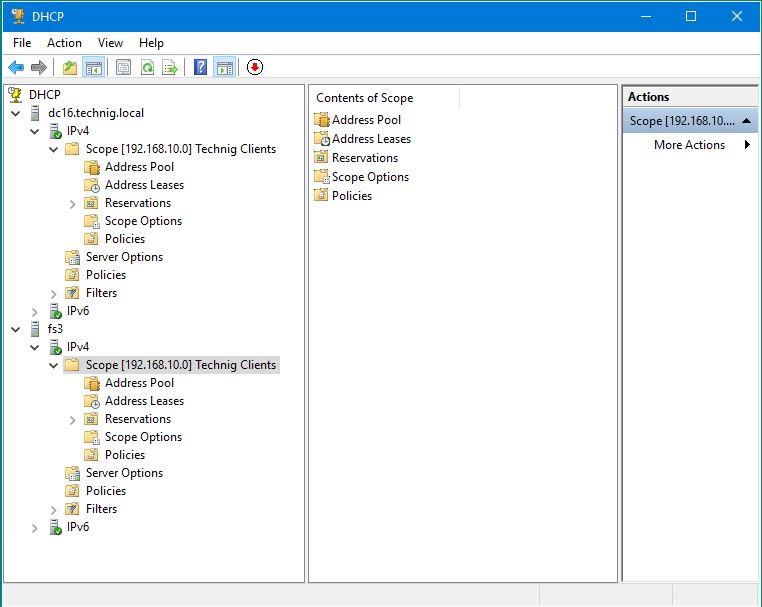
7. Once refresh the DHCP console or reconnect the server to see the final result. Now the DHCP servers are ready to work as DHCP load balancing service and your clients never fail to obtain IP address.
That is all about DHCP High Available or configure DHCP Failover on Windows Server 2016. The same configuration works on Windows Server 2012 also.